
5 Tips for Viewing and Photographing the Northern Lights
In my mind, few natural phenomena match the magic or grandeur of the aurora borealis. I’ve been actively chasing this natural wonder, also known as the Northern Lights, for over a decade. Based on my experience chasing the lights, here are my top 5 tips for increasing your chances of viewing and/or photographing the northern lights.
In my mind, few natural phenomena match the magic or grandeur of the aurora borealis. I’ve been actively chasing this natural wonder, also known as the Northern Lights, for over a decade. I’ve witnessed the lights materialize in an array of colours—green, purple, pink, reddish, and white—in a variety of patterns and effects, from flashing and pulsing shapes to softly flowing ribbons of light.
How does the aurora borealis occur? Here’s the oversimplified version: when charged particles from the sun strike atoms in Earth’s atmosphere, they cause electrons in the atoms to move to a higher-energy state. When the electrons drop back to a lower energy state, they release photons (light). The wavelength of the photon determines the colour we will see, and the wavelength of the photon depends on the gas that’s being excited. Oxygen will emit green/yellow or red, ionized nitrogen will emit purple, nitrogen will emit light blue, and the other colours are caused by a blending of the two, among other factors.
Understanding the science behind the northern lights doesn’t guarantee that you will be able to see or photograph them. Based on my experience chasing the lights, here are my top 5 tips for increasing your chances of viewing and/or photographing the northern lights.
For a deeper look including tips for reading data, post-processing tips, and a thorough list of resources, check out my eBook: Guide to Viewing and Photographing the Northern Lights (use checkout code AURORAWATCH15 to save 15%!)
1. Understand Your Chances
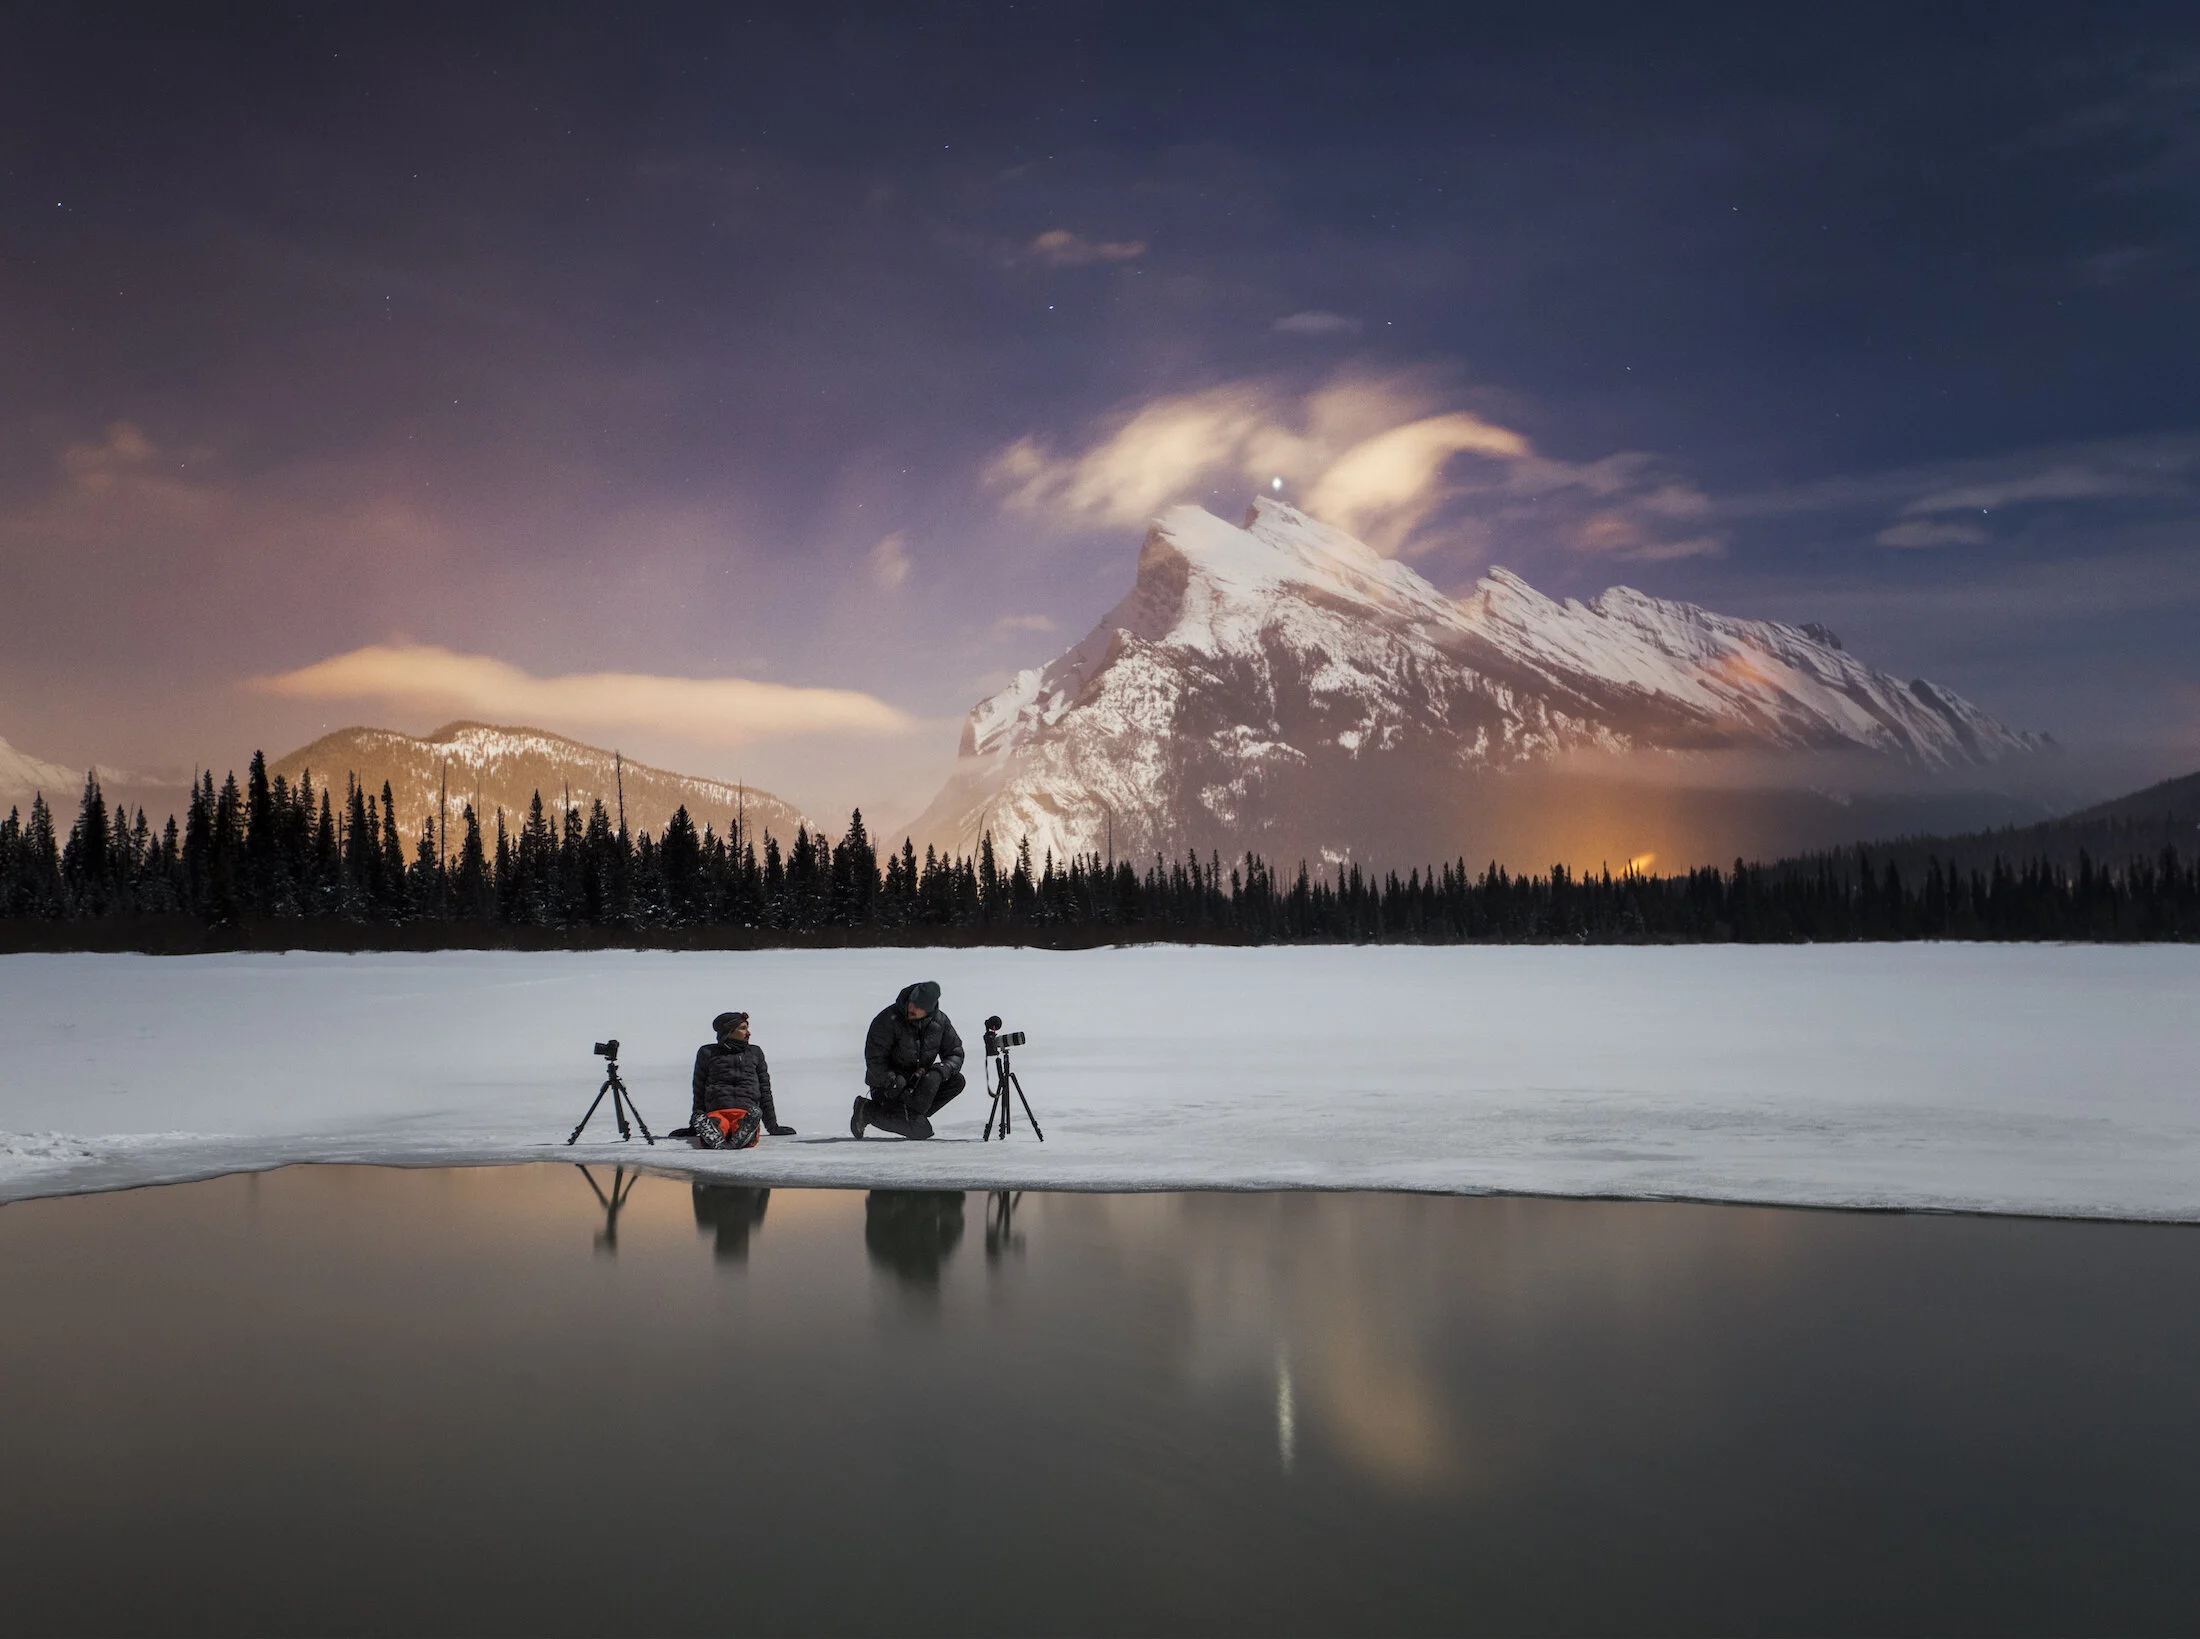
Your chances of catching the northern lights depend on four factors aligning:
Northern lights activity
Clear skies
Unobstructed views north
Little light pollution.
Put simply, you need the lights to be active, but you also need to be able to see them.

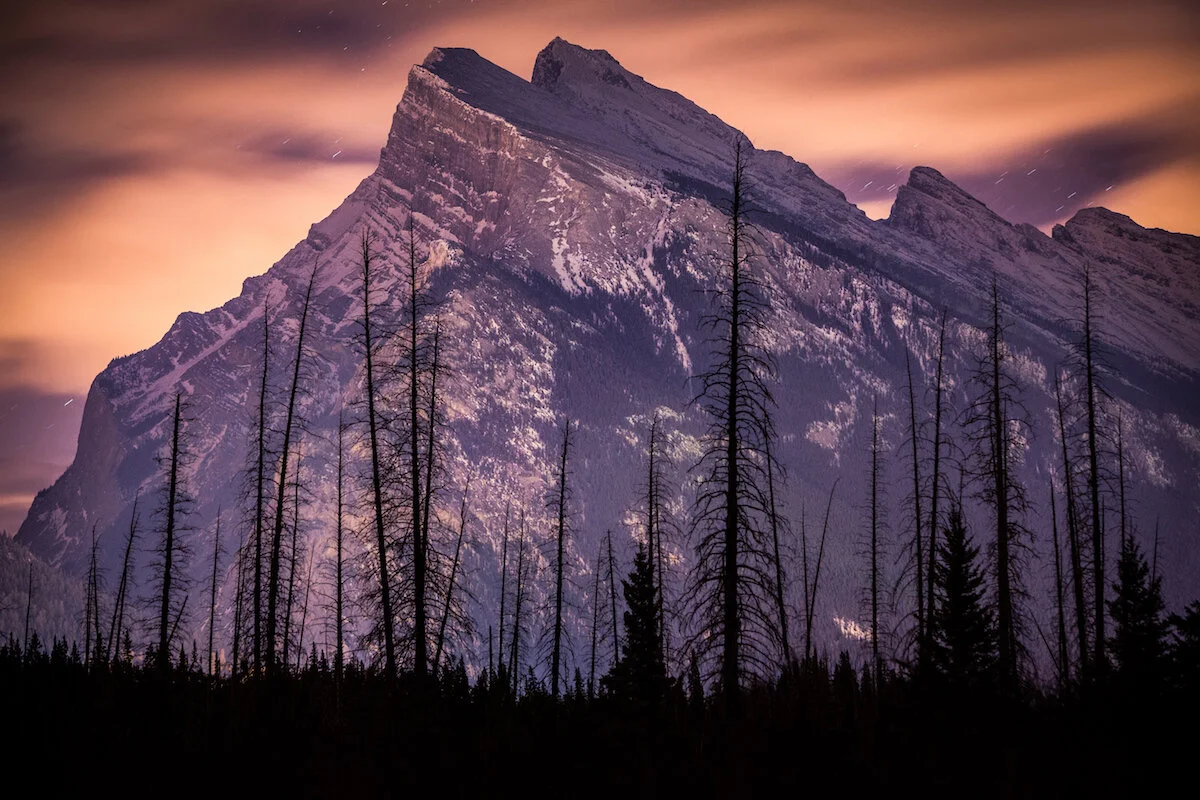
Vermilion Lakes and Mount Rundle, Banff National Park. Photo by Paul Zizka.
2. Get the Right Tools for the Job
Set yourself up for success with the tools and gear that will help you achieve your goal. It doesn’t necessarily need to be the latest or most expensive gear either.
For viewing the northern lights, you’ll need:
A headlamp to help you navigate in the dark.
Access to aurora data or experts (find a list in my eBook!)
Don’t leave without gear and clothing to keep you comfortable including warm layers, warm footwear (cold feet are the beginning of the end!), and hand warmers or heating packs.
For photographing the northern lights:
A DSLR or mirrorless camera that can handle low-light situations
A lens with a fast aperture (ideally 2.8) and wide field of view (ie. 14-18 mm on a full-frame camera)
A sturdy tripod that you can adjust efficiently
For self-portraits or time-lapse: An intervalometer that enables you to program exposures ahead of time (some cameras have this built-in)
A bright headlamp (ideally 200 lumens+ with various beam shapes and power levels plus a red light setting) is useful for focusing images or illuminating subjects. Extra light sources like a Lume Cube can also be handy.
Use code PAULZIZKAPHOTO to save 10% on Lume Cube products.

Self-portrait, Banff National Park. Photo by Paul Zizka.
3. Plan Ahead
Preparation is key, especially when you want to savour every moment the lights are dancing above you.
Scout north-facing locations in the daytime to get a lay of the land and keep a few of these locations in your back pocket. Photographers may even wish to create a visual inventory of compositions in each bookmarked location.
Have a safety plan in place, particularly if you’re going to a remote location on a cold night. This includes packing a first-aid kit, means of communication, and bear spray as well as letting someone at home know what your plans are.
It’s best to be ready for the northern lights at a moment’s notice. Keep your devices and batteries fully charged so they are ready to grab and go at a moment’s notice. It’s also helpful to store spare batteries in warm pockets while in the field.

Ice climber under the aurora. Photo by Paul Zizka.
4. Take Technical Considerations
Photographers chasing the northern lights should keep in mind that night photography can be challenging and time-consuming. Here are some tips that have helped me come away with better images:
Shoot raw to give yourself as much data to work with in the editing room.
Rely on your histogram rather than your LCD to avoid going home with overly dark images.
Turn off auto ISO and shoot in manual mode. I’ve found that taking full control of the settings works better in night photography situations.
Use your lens hood to block stray light.
Use a two-second timer or trigger the shot with an intervalometer as the act of pressing the shutter button can be enough to introduce camera shake.
Download my eBook: Guide to Viewing and Photographing the Northern Lights where I provide my starting settings to help to you get off on the right foot. (Use checkout code AURORAWATCH15 to save 15%!)

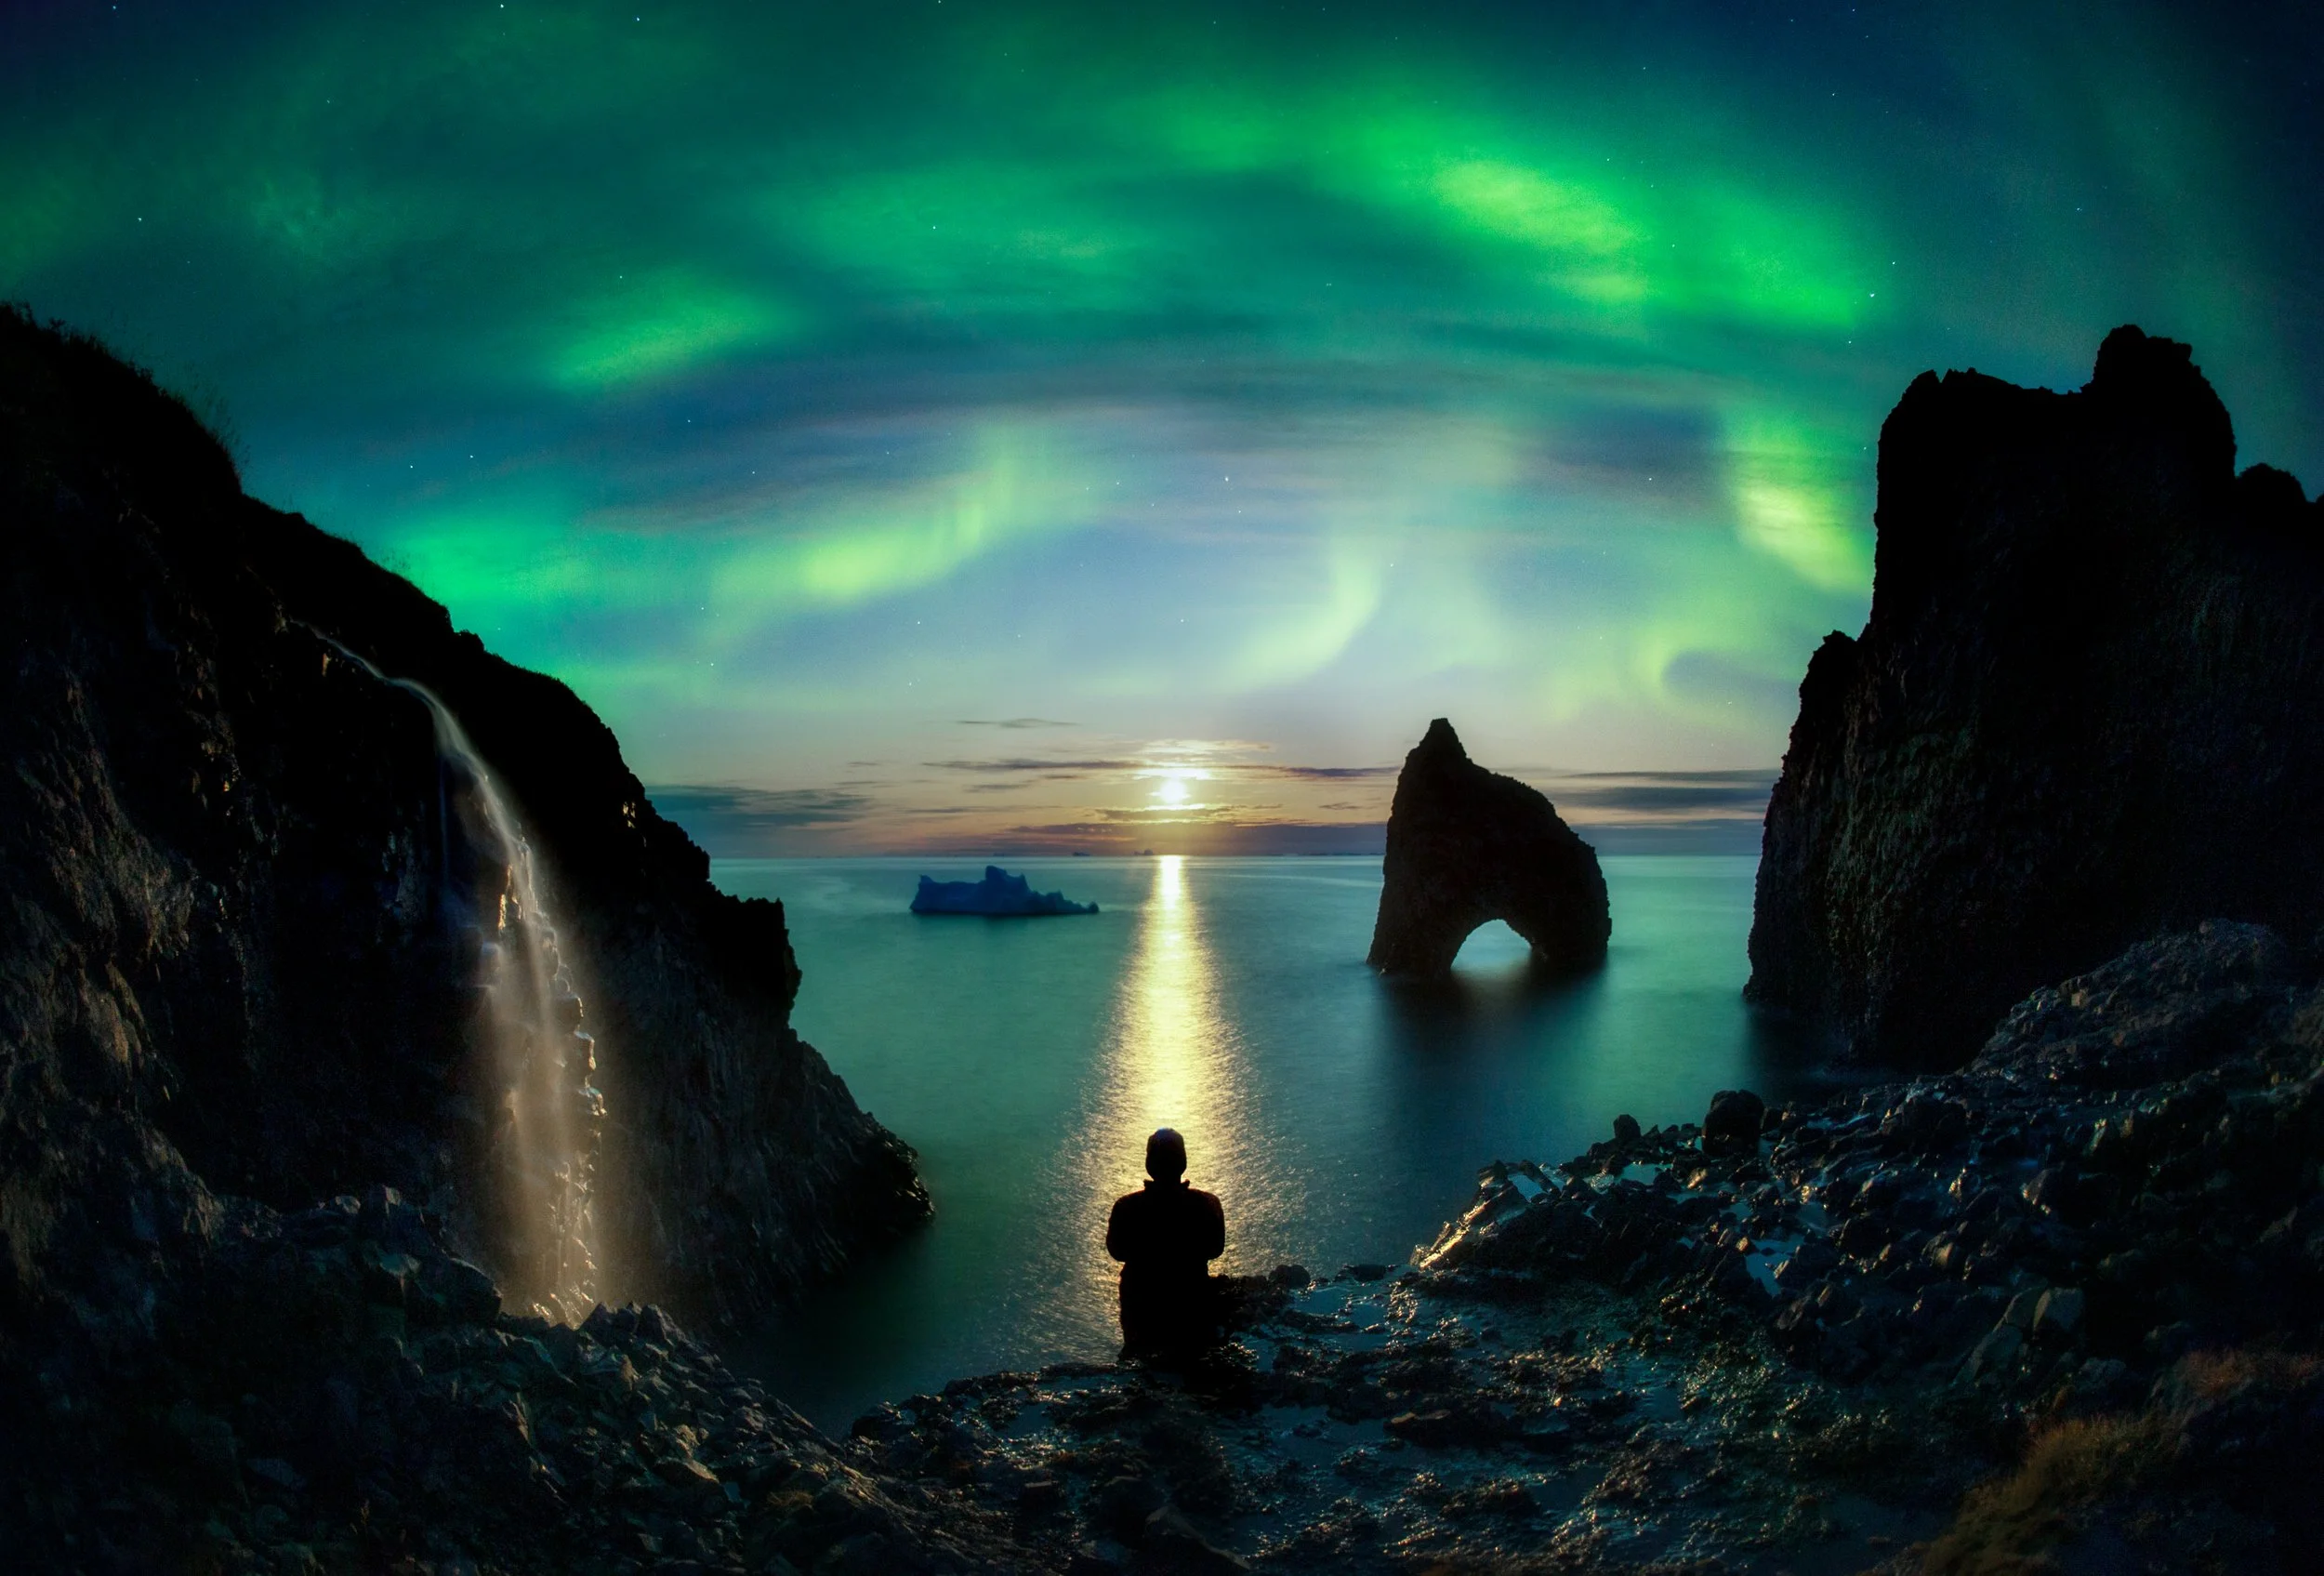
A curtain of lights in Greenland. Photo by Paul Zizka.
5. Commit the Time
Remember that catching the aurora borealis requires patience and persistence. There are so many factors that need to align to catch a good show, so don’t be discouraged if it takes multiple tries. Enjoy the thrill of the chase and stick with it!
Walking away from a northern lights show with strong photographs takes time too. The “spray and pray” technique that is often employed during the day simply doesn’t work at night due to the time-consuming nature of long exposures and astrophotography. Don’t be afraid to commit as much as 30 minutes to a single frame. The more you practice, the more efficient you will be when Mother Nature shows off her beauty.
And whatever the results, I hope you’ll put your experience in nature ahead of the images.

Daughter’s first aurora. Self-portrait by Paul Zizka.
For a deeper look including tips for reading data, post-processing tips, and a thorough list of resources, check out my eBook: Guide to Viewing and Photographing the Northern Lights (use checkout code AURORAWATCH15 to save 15%!)
Learn more:
Take a peek at my gear list to see what I rely on in the field.
Learn astrophotography techniques in-person at my Banff at Night workshop or online through my Shooting Stars: The Art of Astrophotography course.
Check out my 10 Favourite Places to Shoot the Northern Lights.
2022 Prime Time Calendar for Canadian Rockies Photography
I’m excited to launch the 2022 Prime Time Calendar for Canadian Rockies Photography! This planning calendar is a handy tool for photographers so that they can make the most of seasonal conditions and celestial phenomena in Canada’s prized mountain range.
I’m excited to launch the 2022 Prime Time Calendar for Canadian Rockies Photography! This planning calendar is a handy tool for photographers so that they can make the most of seasonal conditions and celestial phenomena in Canada’s prized mountain range.
For the past decade, Paul has been carefully watching when particular seasons unfold, from the needles changing on Lyall's larch trees to methane bubbles appearing in frozen lakes. This calendar combines that knowledge with known celestial or annual events, creating the perfect tool to help you plan your photography in the Canadian Rockies.
→ Note: This is a printable PDF catered to photographers, not to be confused with a hard-copy display/decorative wall calendar.
THIS YEAR THE CALENDAR IS FREE!

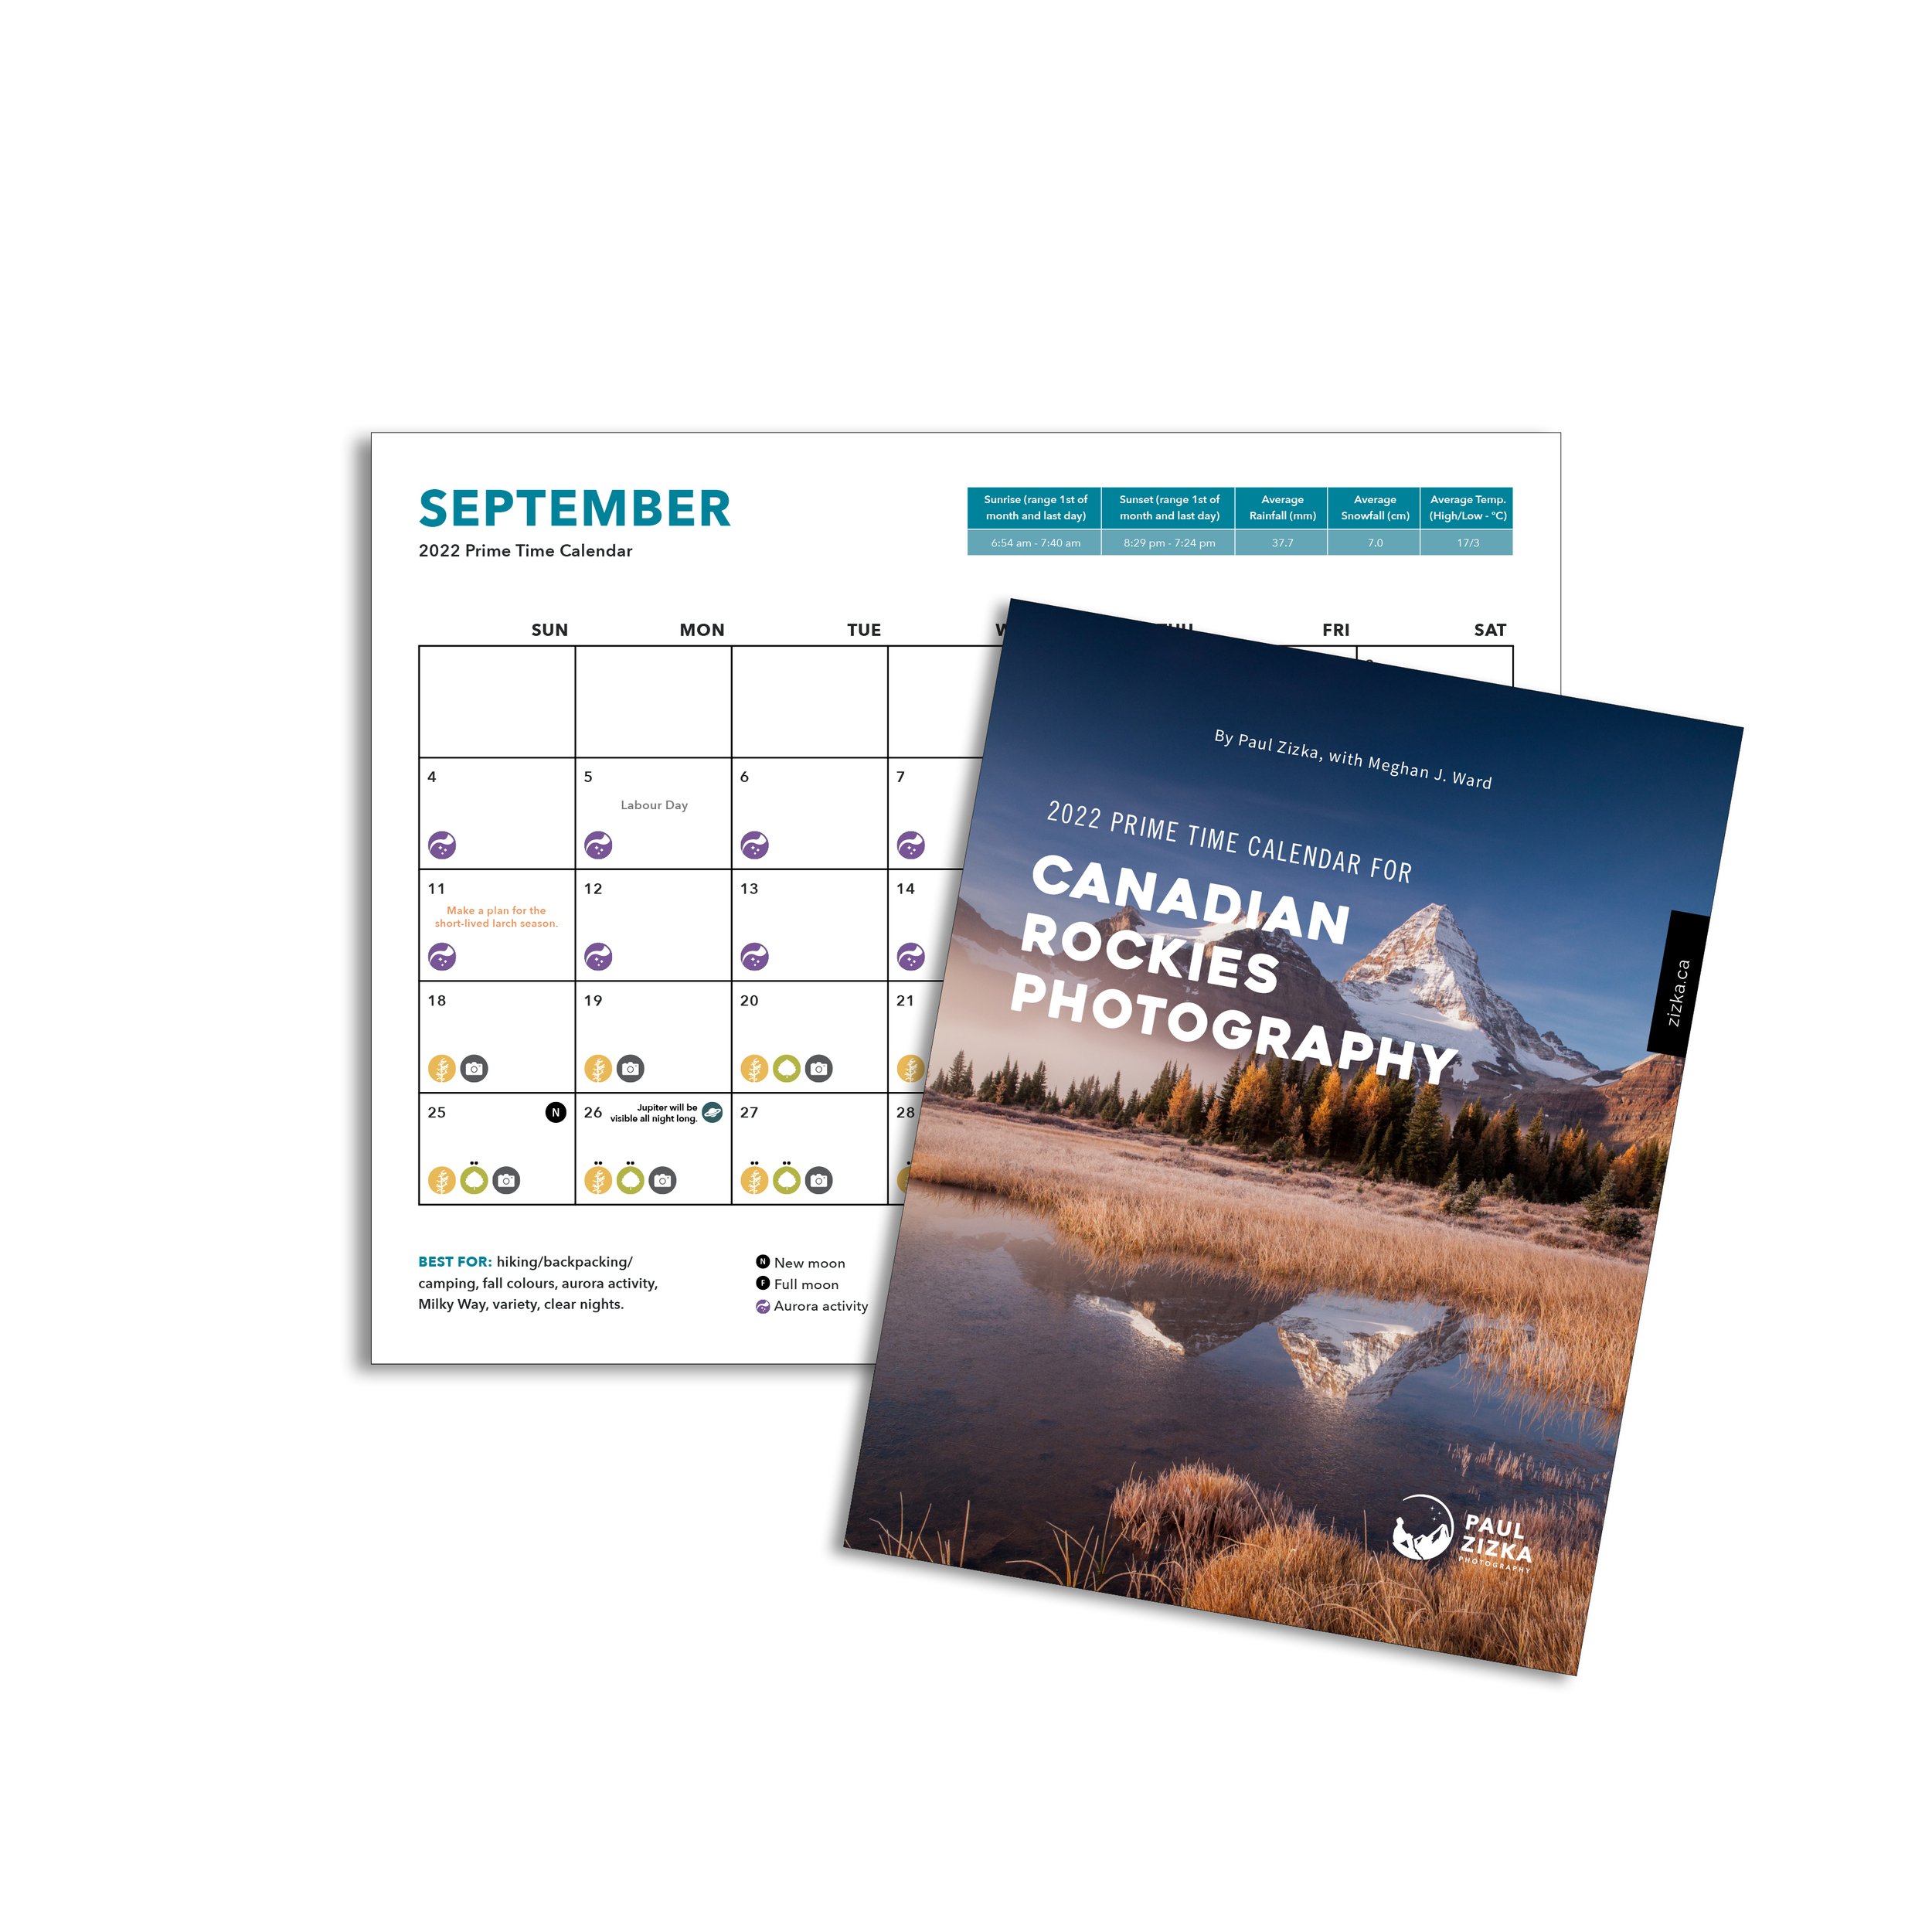

What's inside!
* Seasons and peak times for fall colours (Aspen, Lyall's larch and Western larch), methane bubbles, aurora activity, wildflowers, and Milky Way.
* Monthly and annual summaries for sunrise/sunset, average rainfall/snowfall and average temperatures.
* Celestial events, such as meteor showers, planet visibility, lunar eclipses and moon cycles.
* Paul's personal favourite times of the year.
* Recommended photo apps.
* Photo prompts and tips.
* Seasonal road closures in the Canadian Rockies.
Striking Gold: A Larch Season Photo Mission with the Lowepro PhotoSport PRO
Magic unfolds in the Canadian Rockies during the transition to fall. It’s larch season, a glorious but short-lived window where the needles of this “deciduous conifer” transform from green to gold, and the perfect time to set off on an overnight backcountry adventure with the brand new Lowepro PhotoSport Pro.
Guest post by Trixie Pacis.
Originally published by Lowepro.
Magic unfolds in the Canadian Rockies during the transition to fall. It’s larch season, a glorious but short-lived window where the needles of this “deciduous conifer” transform from green to gold. If you conjure an image of the iconic peaks and turquoise lakes of the Rocky Mountain landscape beneath a blanket of fall hues, you’ll understand why droves of photographers and adventurers converge on this colourful display. I set off on an overnight backcountry adventure with award-winning adventure photographer Paul Zizka to see what all the fuss was about.
Planning a Larch Season Photo Mission
When it comes to capturing golden larches, timing is everything. Larch season lasts just a few weeks, typically from late September to early October, until the trees shed their needles for the winter. Arrive too early and the larches will blend in with neighbouring evergreens. Wait too long and the needles will have faded or been blown off the branches by a storm.
Paul and I plotted an overnight backcountry trip to capture this phenomenon. Paul was adamant about an overnighter because it would allow him to shoot the golden larch trees and turquoise lakes of the high in the alpine in early morning and evening light. Paul chose a destination on the border of Banff National Park and Kananaskis Country in the Canadian province of Alberta with two objectives in mind: the northwest ridge of Mount Birdwood as well as a stroll through the larch forest around Mount Smutwood. He arranged for a Banff National Park bivouac permit to camp overnight as well as a permit to recreate in Kananaskis Country, through which we would be passing. With a departure date and destination set, it was time to pack our bags.
Packing for an Overnight Photography Adventure
Autumn is a beautiful season to explore at high elevations but camping in cold weather requires additional gear. I’ve embarked on multi-day treks from Alaska to the Himalayas with a camera in tow but on this trip, I discovered that not all backpacks are made equal; watching Paul use a bag designed for photographers as much as backpackers was a revelation.
I met Paul at his place on the crisp September morning of our trip. Paul was in the process of packing and introduced me to the Lowepro PhotoSport PRO 70L backpack, the latest addition to Lowepro’s proven line of camera bags. In a nutshell, PhotoSport PRO was designed for photographers going on multi-day backcountry expeditions. It integrates all the features required for an overnight trip plus all the bells and whistles for secure and convenient camera access.
“They really thought of everything,” Paul said as he packed the PhotoSport PRO with all the gear he would need for our trip. Indeed, the bag was designed with every essential detail in mind.
→ We’re giving away a Lowepro PhotoSport PRO 70L backpack (value $699 CAD). Enter here!
Camera Gear: The PhotoSport PRO features front and back panel access. Favouring the rear opening, Paul packed his Canon R5 mirrorless camera and three lenses using the GEARUP PRO XL insert that comes with customizable velcro inserts to hold everything in place. There was even extra room for a few additional items including his headlamp.
Camping Gear: With his camera secure, Paul loaded his sleeping bag and mat into the backpack’s bottom pocket. Storing these items here cleverly provides extra padding below the camera gear. He then strapped his one-person tent to the adjustable straps outside the bottom pocket.
Paul packed his camping stove, dehydrated meals, and spare layers in the PhotoSport PRO’s main compartment along with the RunAbout foldable day pack. Even after packing all the essentials for a one-night trip, there was plenty of room to spare.
Accessories: Paul tucked his tripod and water bottle into the side pockets (pointing out that the bag has a side pocket for those who prefer hydration reservoirs with drinking tubes. Last but not least, Paul stashed the small accessories he wanted to keep accessible in the removable lid including his phone, wallet, sunglasses, and satellite device.
Before setting off, Paul adjusted the torso length, load lifter straps, chest straps, and padded waist straps for maximum comfort. Paul also mentioned that the Activ Lift system and adjustable pivoting waist transferred weight to the hips and provided a wider range of motion.
I was intrigued by the bag’s thoughtful design and curious to see it in action.

The Lowepro PhotoSport PRO 70L backpack holds up against heavy rain. Photo by Trixie Pacis.
Striking Gold
Within a few hours, Paul and I were deep in moose country with the trailhead far behind us. The start of our adventure traced a river through the forest and into an open valley. The sun was shining and a light dusting of snow accentuated each sedimentary layer of the surrounding peaks. We bid the valley floor farewell and began our ascent to the high alpine. We were soon surrounded by larch trees of every hue—from neon green with gold tips to buttercup yellow. I felt the euphoria of “striking gold”.
Suddenly, winter was upon us. Thick snowflakes fell, many carried sideways by fierce gusts of wind. By the time we reached our bivy spot, the ground was white. Paul and I pitched our tents amidst a stand of butterscotch-coloured larches then glanced at the northeast ridge of Mount Birdwood through the fiery foliage. We quickly agreed to adapt our plans in light of the unexpected weather. The summit of Mount Birdwood was just around the corner and looked manageable despite the fresh layer of snow.

Paul hikes towards the summit of Smutwood wearing the RunAbout insert. Photo by Trixie Pacis.
The Runabout
It was time to explore with fast and light. It only took a minute for Paul to transfer the GEARUP PRO XL housing all of his camera gear into the RunAbout day pack. It fit like a glove with just enough room for a spare layer, water, snacks and accessories. Without the same efficient system, my fingers froze before leaving camp.
We spent the evening on high ridges, photographing golden larches against turquoise lakes and white snow, and shouting in excitement over the wind. Working side-by-side, I couldn’t help but notice that Paul’s camera gear had been at his fingertips every step of the way. Whether carrying the PhotoSport PRO or the RunAbout, only two smooth zippers stood between him and his camera. Meanwhile, I was fumbling with multiple buckles, cinches, and zippers to wrestle mine free. The biting cold only accentuated the difference.

Paul photographs a pair of larches on the ridge to Smutwood. Photo by Trixie Pacis.
One Bag, Three Seasons
We crawled out of our tents at the crack of dawn to capture larches in the morning light and discovered that the fallen snow had melted overnight. Rain pummelled down from the heavens as we explored the grove of larch trees around Birdwood Lakes. Even on that torrential day, nature’s brilliant display had us running around in search of new compositions with childlike fervour.
In just one trip, Paul put his gear to the test in three seasons: summer, fall, and winter. When I finally asked him what he thought of the bag, he called it his “new go-to for future expeditions.”
That told me everything I needed to know about the Lowepro PhotoSport PRO 70L.


Photos by Paul Zizka.
The PhotoSport PRO in Action
Check out this video to go behind the scenes as Paul puts the Lowepro PhotoSport PRO to the test!

Resources for Photographing the Canadian Rockies
Each week I get emails or messages from fellow photographers asking where they should photograph in Banff National Park and the Canadian Rockies. Others ask me where to go hiking or scrambling so that they can get off the beaten track. I love getting these questions and seeing people’s enthusiasm for shooting these beautiful mountain landscapes.
Each week I get emails or messages from fellow photographers asking where they should photograph in Banff National Park and the Canadian Rockies. Others ask me where to go hiking or scrambling so that they can get off the beaten track. I love getting these questions and seeing people’s enthusiasm for shooting these beautiful mountain landscapes.
To provide you with some direction, I thought I’d compile a list of resources that will help you photograph the Canadian Rockies – books, websites and apps you can leaf through for yourself to identify your next photo sweet spots.
Mt. Rundle, Banff National Park. Photo by Paul Zizka Photography.
Books About Hiking, Scrambling and Mountaineering
Canadian Rockies Trail Guide, by Brian Patton and Bart Robinson
The definitive and comprehensive Canadian Rockies hiking guide book.
Classic Hikes in the Canadian Rockies, by Graeme Pole
An experienced hiker/author compiles his list of classic hikes in the Rockies.
Scrambles in the Canadian Rockies, by Alan Kane
The best resource for beginner to advanced scrambles in the Canadian Rockies.
11,000ers of the Canadian Rockies, by Bill Corbett
All the big peaks of the Rockies in one comprehensive guidebook.
Canadian Rockies Photography Facebook Group
Join our Facebook Group dedicated to exploration and creativity through photography in the Canadian Rockies!
E-Book: Photography in the Canadian Rockies
For my opinionated guide on 60+ locations between Banff and Lake Louise, check out Paul Zizka’s Guide to Photography in the Canadian Rockies.

* Features 60+ locations organized into regions:
1. In and Around Banff Town
2. Lake Minnewanka
3. Bow Valley Parkway
4. Banff to Lake Louise via HWY1
5. Lake Louise and Area
* The best spots to shoot aurora borealis, wildflowers and fall colours.
* Easy-to-use symbols to guide you through each location, as well as access to online map.
* Suggested itineraries for 1 or 3 days in summer and winter.
Get your copy of Paul Zizka’s Guide to Photography in the Canadian Rockies.

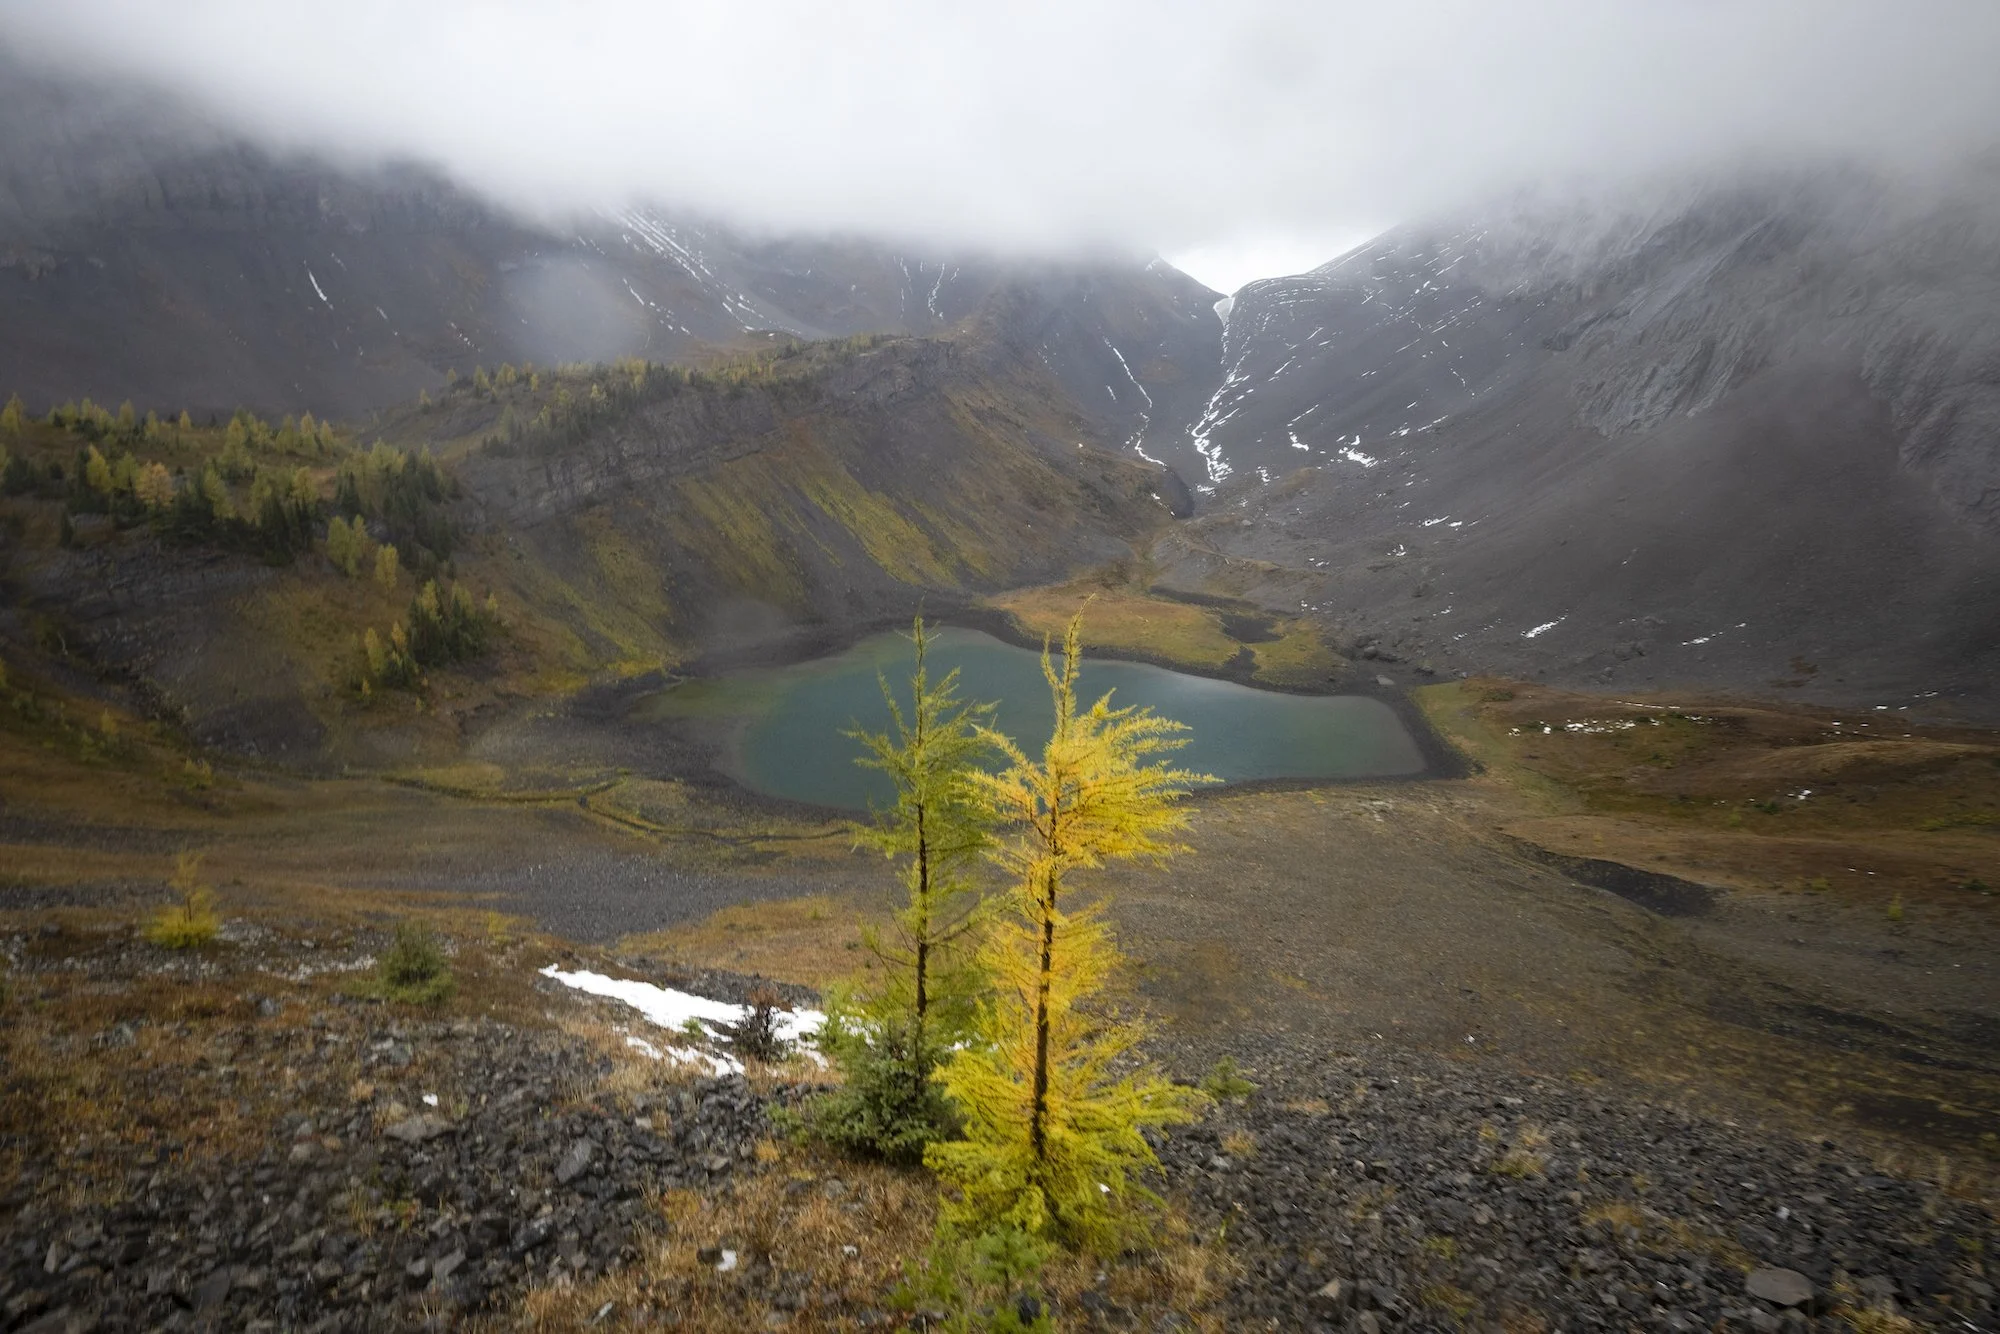
Some locations in the Canadian Rockies are obscure, require good fitness and navigational skills. If you’re really keen to venture off the beaten track, I highly recommend you invest some time in finessing these skills. Coleman Lake, backcountry of Banff National Park. Photo by Paul Zizka.
Apps for Photography + Tracking Weather and Skies
I’ve been an iPhone user for years, and rely on a number of apps to help me make the most of my photos and “read the skies” in the Canadian Rockies.
Photo Apps
PhotoPills: Sort of a Swiss Army knife for photographers and great for planning shoots precisely.
The Photographer’s Ephemeris: Another great photo planning app.
Weather/Sky Apps
SpotWx: precise, thorough weather info.
StarWalk: A stargazing app, great for identification of constellations and celestial features.
ClearDarkSky: for cloud cover
Webcams
It’s easy to overlook this one, but webcams give you an instant look at conditions from higher elevations and in distant areas.
Aurora Watching Web Resources
Perhaps the biggest question of all is where people can shoot the auroras in the Canadian Rockies. Thanks to our dark skies, you have a good chance of seeing them if they’re out, so long as there is no cloud cover.
One of the best resources for tracking them in Alberta is the Facebook group called Alberta Aurora Chasers. You can request to join here: AlbertaAuroraChasers.
I have also compiled my personal favourites in another blog post. You’ll need to learn to read the data, but you’ll find the full collection in Aurora Watching Web Resources.

Aurora Watching Web Resources
The big "FAQ" for me has always been "which northern lights prediction websites do you recommend?" No matter how much one monitors the data available, viewing the aurora always involves an element of unpredictability. Familiarizing yourself with the following resources should improve your chances.
The big "FAQ" for me has always been "which northern lights prediction websites do you recommend?" No matter how much one monitors the data available, viewing the aurora always involves an element of unpredictability. Familiarizing yourself with the following resources should improve your chances.
→ Alberta Aurora Chasers - Facebook Group
reports from aurora chasers on the ground
reporting auroras from the ground up
Alberta aurora status
Continued below…
More great resources to help you track, view and photograph the Northern Lights:
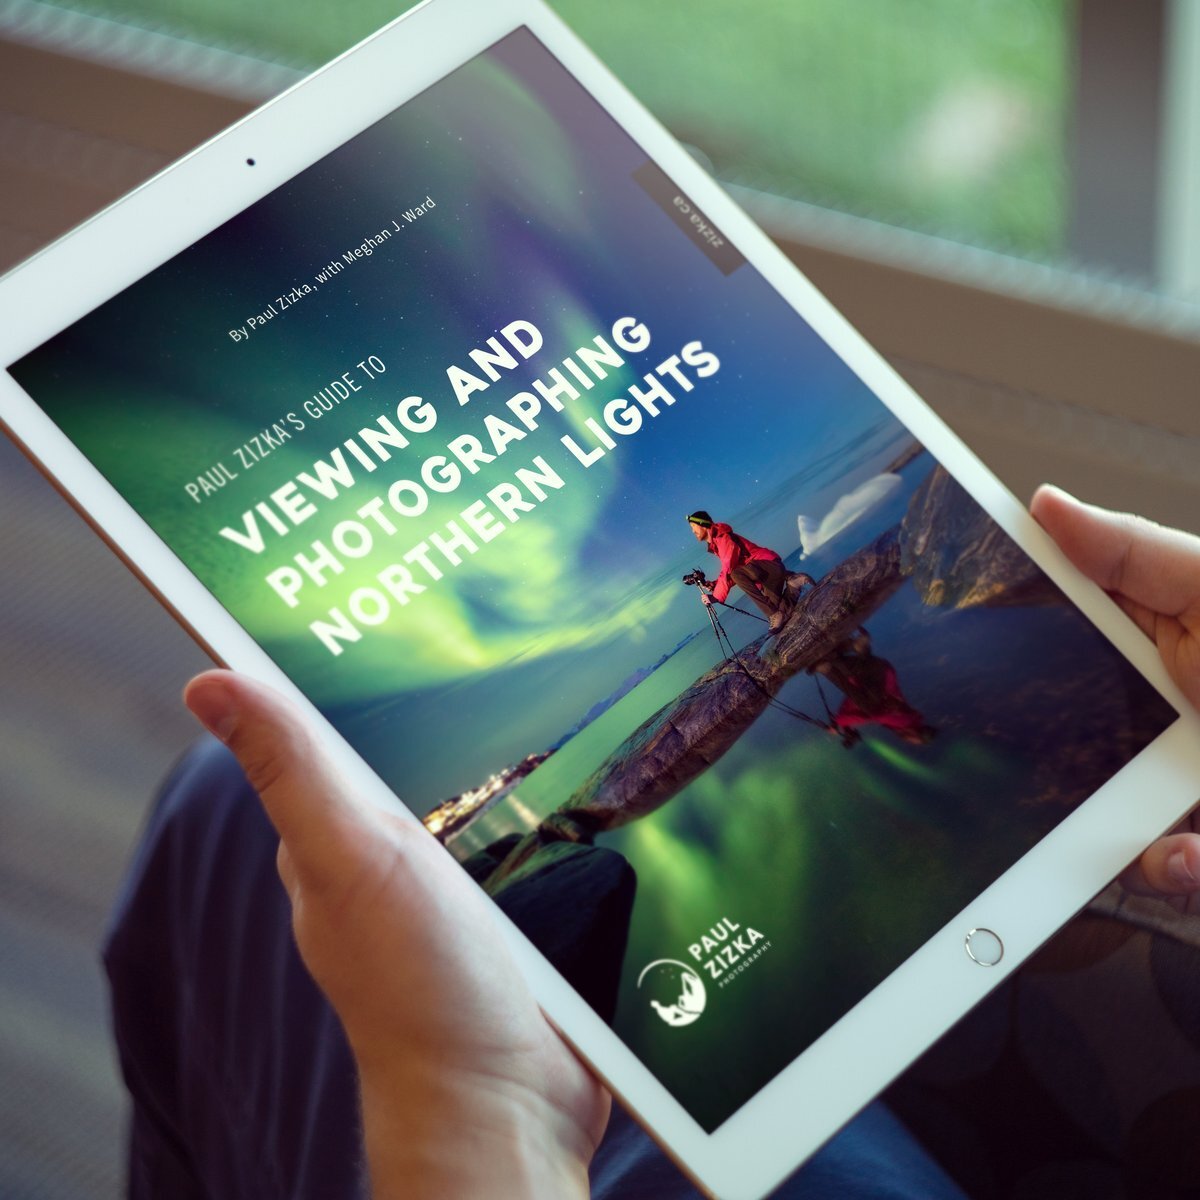
eBook: Paul Zizka's Guide to Viewing and Photographing Northern Lights
Astrophotographer Paul Zizka gives his best tips, tools, and resources for both viewing and photographing the northern lights. From tracking the data to camera settings and editing tips, this comprehensive guide is all you need to get started! This eBook is suitable for non-photographers and photographers of all levels of experience.
aurora borealis forecast
→ SolarHam
the latest space weather news and updates
→ Space Weather Prediction Centre
current space weather conditions
news and information about the sun/earth environment
→ University of Alaska Geophysical Institute
Alaska aurora forecasts
Tromsø LIVE northern lights solar activity, prediction and forecast
If you like northern lights photos, check out The Canadian Rockies: Rediscovered, by Paul Zizka.