
10 Tips for Cold Weather Photography
It’s an FAQ I get in my DMs regularly: How to make the most of cold conditions, how to plan ahead so that the cold isn’t a deterrent or massive obstacle, and also how to protect camera gear in tough conditions. I thought I’d compile some tips for you all so that you can be ready for cold-weather photography and not be intimidated by the experience. Here goes!
It’s an FAQ I get in my DMs regularly and most recently through my Substack: How to make the most of cold conditions, plan ahead so that the cold isn’t a deterrent or massive obstacle, and also how to protect camera gear in tough conditions. I thought I’d compile some tips for you all so that you can be ready for cold-weather photography and not be intimidated by the experience. Here goes!
1. Bundle up.
With high-performance gear on the market, it's becoming much easier to be reasonably comfortable out there in the cold. Layer your clothing, buy a box of cheap heat packs and keep a box in the car. Activate the heat packs 10-15 minutes before you need them. Even better - get battery-operated hand warmers. And it doesn't matter how warm your body is, if your feet are cold, you won't last very long out there. Invest in a good pair of well-insulated boots, as well as warm socks. Don't worry about what you look like - just stay warm. There are no points for style out there: function over form! Avoid sweating at all costs. Trust me, discomfort leads you to rush through your process, and it will show in your images.
2. Know your gear.
Bone-chilling temperatures are not ideal for figuring out how to bring up your
histogram, how to change shutter speed or operate your tripod. It's all about efficiency out there and it really helps if you're familiar with your gear, and can operate it with gloves on. If you have to, practice changing settings with mitts on in the comfort and warmth of your home.
3. Insulate metal parts.
Touch an aluminum tripod with bare hands in cold weather, and you’ll quickly learn you never want to do it again. If you’d like to save your fingerprints, prep the metal parts of gear that you might be handling without gloves. It's helpful, for example, to cover your tripod legs and knobs with some sort of insulation, such as hockey tape or foam.
4. Battery power.
It's one of my main concerns out there. I always keep two spare batteries in an inner pocket. If you're doing time-lapses or long exposures in very cold temperatures (-30C and below), I would recommend carrying tape or rubber bands so you can place hand warmers close to your battery compartment. Also, consider investing in a battery grip to keep the power going. If you are about to proceed with a time-consuming operation, like star trails or a time-lapse, make a point of switching to a full, warm battery so your process is not interrupted. Put the depleted batteries in a different pocket than the full batteries so you don’t get confused.
5. Use two camera bodies.
Changing lenses can be a real challenge in cold, wintery conditions. Handling gear in the cold is hard enough, but when you change lenses you also risk exposing your sensor to moisture and falling snow. If you have a backup body, consider going out with two cameras so you can shoot at different focal lengths without having to switch lenses.

Fellow photographer Lee Nordbye in an ice cave in the Canadian Rockies. Photo: Paul Zizka
6. Watch for moisture.
When pressing the shutter, take care not to exhale near the lens. Look away from the camera, or take a step back, before exhaling. Otherwise, you risk condensation freezing to the surface of your lens instantly. Some companies make dehumidifying lens caps which can help with that problem. Also, it’s not a bad idea to keep silica packs in your camera bag at all times, and to change them occasionally.
Depending on your gear, you may need to be cautious about drastic temperature differences, such as when you return to your heated vehicle, or go back indoors. Before exposing your gear to that warmth, place it in a sealed bag (such as a Ziploc) until it has reached room temperature. This will prevent condensation forming on the camera and lens. Add a silica gel pack to the bag to further cut down on moisture.
7. Keep food and hot drinks handy.
Snacking will keep your body going for much longer in the cold. But if the food is hard to access you might not bother to dig it out. I like to keep something energy-rich in an easily-accessible pocket, such as nuts, dried fruit or chocolate. A thermos of hot, sweet liquid will keep you warm from the inside-out, and help you to avoid some serious consequences of the cold, such as hypothermia.
8. Be patient.
It's easy to throw in the towel when facing adverse conditions. But take it as
an opportunity to showcase your dedication and patience and to refine your systems. Fingers got too cold? Make a note to bring the handwarmers next time. Fiddling with your camera’s menus too much? Get more familiar with your gear. As you encounter hurdles in the field, make mental notes of them so you can address them before your next outing.
9. Embrace discomfort.
No matter what you do, photographing in freezing temperatures will never feel like shooting a sunset on a beach in Jamaica. But often the difference between a good photographer and a great one is the willingness to go through some discomfort to get your images. Work towards spending more and more time out there, and as you walk away with images you like, you'll be more inclined, maybe even excited, to face the cold again.
10. Take advantage of conditions.
Some unique features of the landscape occur only in cold weather – keep an eye out for them! These include methane bubbles in lakes, hoar frost, the interplay of side light and dramatic temperature differences (such as over fog over open water), icicles, long shadows, and the softening effects of an untouched blanket of snow. Sometimes this means venturing out in the coldest temperatures imaginable, but I promise you’ll go home with images you’re proud of.
5 Tips for Viewing and Photographing the Northern Lights
In my mind, few natural phenomena match the magic or grandeur of the aurora borealis. I’ve been actively chasing this natural wonder, also known as the Northern Lights, for over a decade. Based on my experience chasing the lights, here are my top 5 tips for increasing your chances of viewing and/or photographing the northern lights.
In my mind, few natural phenomena match the magic or grandeur of the aurora borealis. I’ve been actively chasing this natural wonder, also known as the Northern Lights, for over a decade. I’ve witnessed the lights materialize in an array of colours—green, purple, pink, reddish, and white—in a variety of patterns and effects, from flashing and pulsing shapes to softly flowing ribbons of light.
How does the aurora borealis occur? Here’s the oversimplified version: when charged particles from the sun strike atoms in Earth’s atmosphere, they cause electrons in the atoms to move to a higher-energy state. When the electrons drop back to a lower energy state, they release photons (light). The wavelength of the photon determines the colour we will see, and the wavelength of the photon depends on the gas that’s being excited. Oxygen will emit green/yellow or red, ionized nitrogen will emit purple, nitrogen will emit light blue, and the other colours are caused by a blending of the two, among other factors.
Understanding the science behind the northern lights doesn’t guarantee that you will be able to see or photograph them. Based on my experience chasing the lights, here are my top 5 tips for increasing your chances of viewing and/or photographing the northern lights.
For a deeper look including tips for reading data, post-processing tips, and a thorough list of resources, check out my eBook: Guide to Viewing and Photographing the Northern Lights (use checkout code AURORAWATCH15 to save 15%!)
1. Understand Your Chances
Your chances of catching the northern lights depend on four factors aligning:
Northern lights activity
Clear skies
Unobstructed views north
Little light pollution.
Put simply, you need the lights to be active, but you also need to be able to see them.

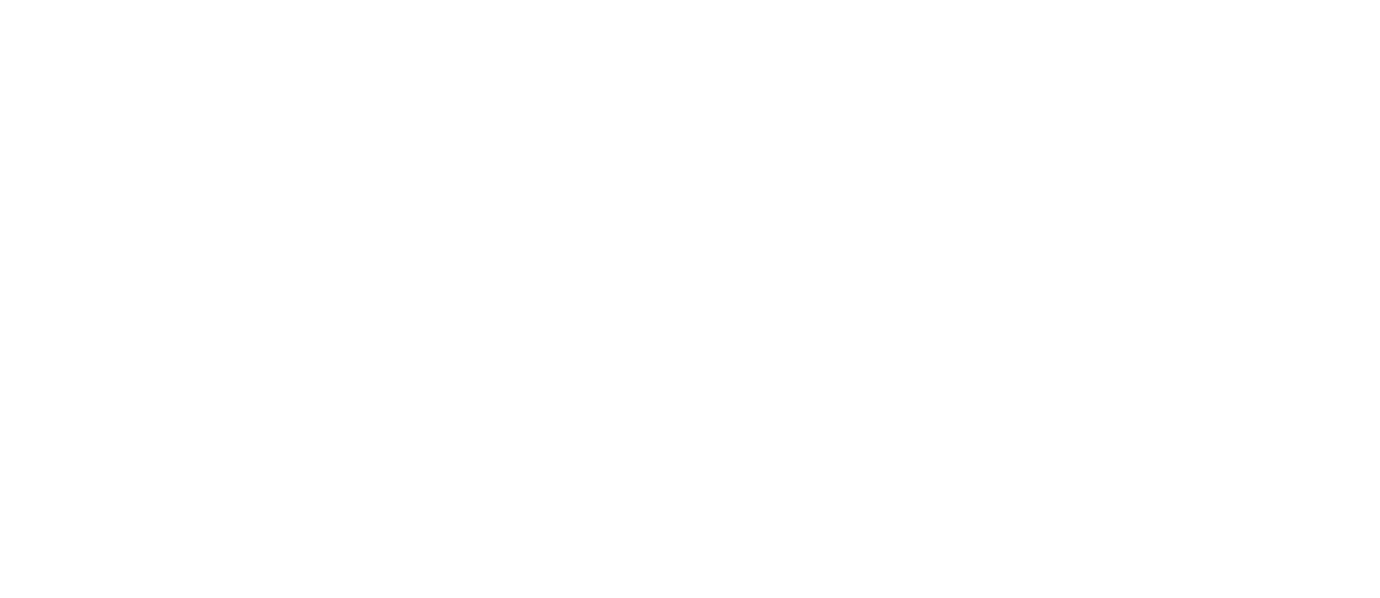
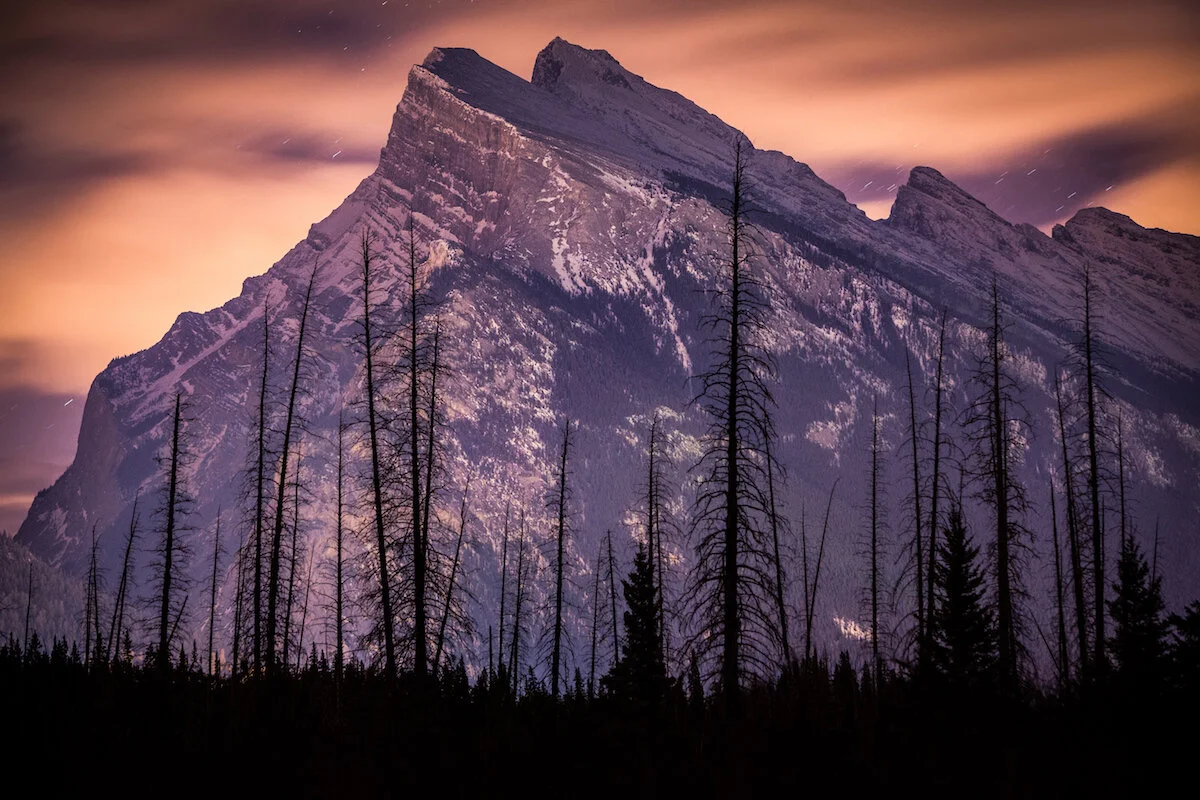
Vermilion Lakes and Mount Rundle, Banff National Park. Photo by Paul Zizka.
2. Get the Right Tools for the Job
Set yourself up for success with the tools and gear that will help you achieve your goal. It doesn’t necessarily need to be the latest or most expensive gear either.
For viewing the northern lights, you’ll need:
A headlamp to help you navigate in the dark.
Access to aurora data or experts (find a list in my eBook!)
Don’t leave without gear and clothing to keep you comfortable including warm layers, warm footwear (cold feet are the beginning of the end!), and hand warmers or heating packs.
For photographing the northern lights:
A DSLR or mirrorless camera that can handle low-light situations
A lens with a fast aperture (ideally 2.8) and wide field of view (ie. 14-18 mm on a full-frame camera)
A sturdy tripod that you can adjust efficiently
For self-portraits or time-lapse: An intervalometer that enables you to program exposures ahead of time (some cameras have this built-in)
A bright headlamp (ideally 200 lumens+ with various beam shapes and power levels plus a red light setting) is useful for focusing images or illuminating subjects. Extra light sources like a Lume Cube can also be handy.
Use code PAULZIZKAPHOTO to save 10% on Lume Cube products.

Self-portrait, Banff National Park. Photo by Paul Zizka.
3. Plan Ahead
Preparation is key, especially when you want to savour every moment the lights are dancing above you.
Scout north-facing locations in the daytime to get a lay of the land and keep a few of these locations in your back pocket. Photographers may even wish to create a visual inventory of compositions in each bookmarked location.
Have a safety plan in place, particularly if you’re going to a remote location on a cold night. This includes packing a first-aid kit, means of communication, and bear spray as well as letting someone at home know what your plans are.
It’s best to be ready for the northern lights at a moment’s notice. Keep your devices and batteries fully charged so they are ready to grab and go at a moment’s notice. It’s also helpful to store spare batteries in warm pockets while in the field.

Ice climber under the aurora. Photo by Paul Zizka.
4. Take Technical Considerations
Photographers chasing the northern lights should keep in mind that night photography can be challenging and time-consuming. Here are some tips that have helped me come away with better images:
Shoot raw to give yourself as much data to work with in the editing room.
Rely on your histogram rather than your LCD to avoid going home with overly dark images.
Turn off auto ISO and shoot in manual mode. I’ve found that taking full control of the settings works better in night photography situations.
Use your lens hood to block stray light.
Use a two-second timer or trigger the shot with an intervalometer as the act of pressing the shutter button can be enough to introduce camera shake.
Download my eBook: Guide to Viewing and Photographing the Northern Lights where I provide my starting settings to help to you get off on the right foot. (Use checkout code AURORAWATCH15 to save 15%!)

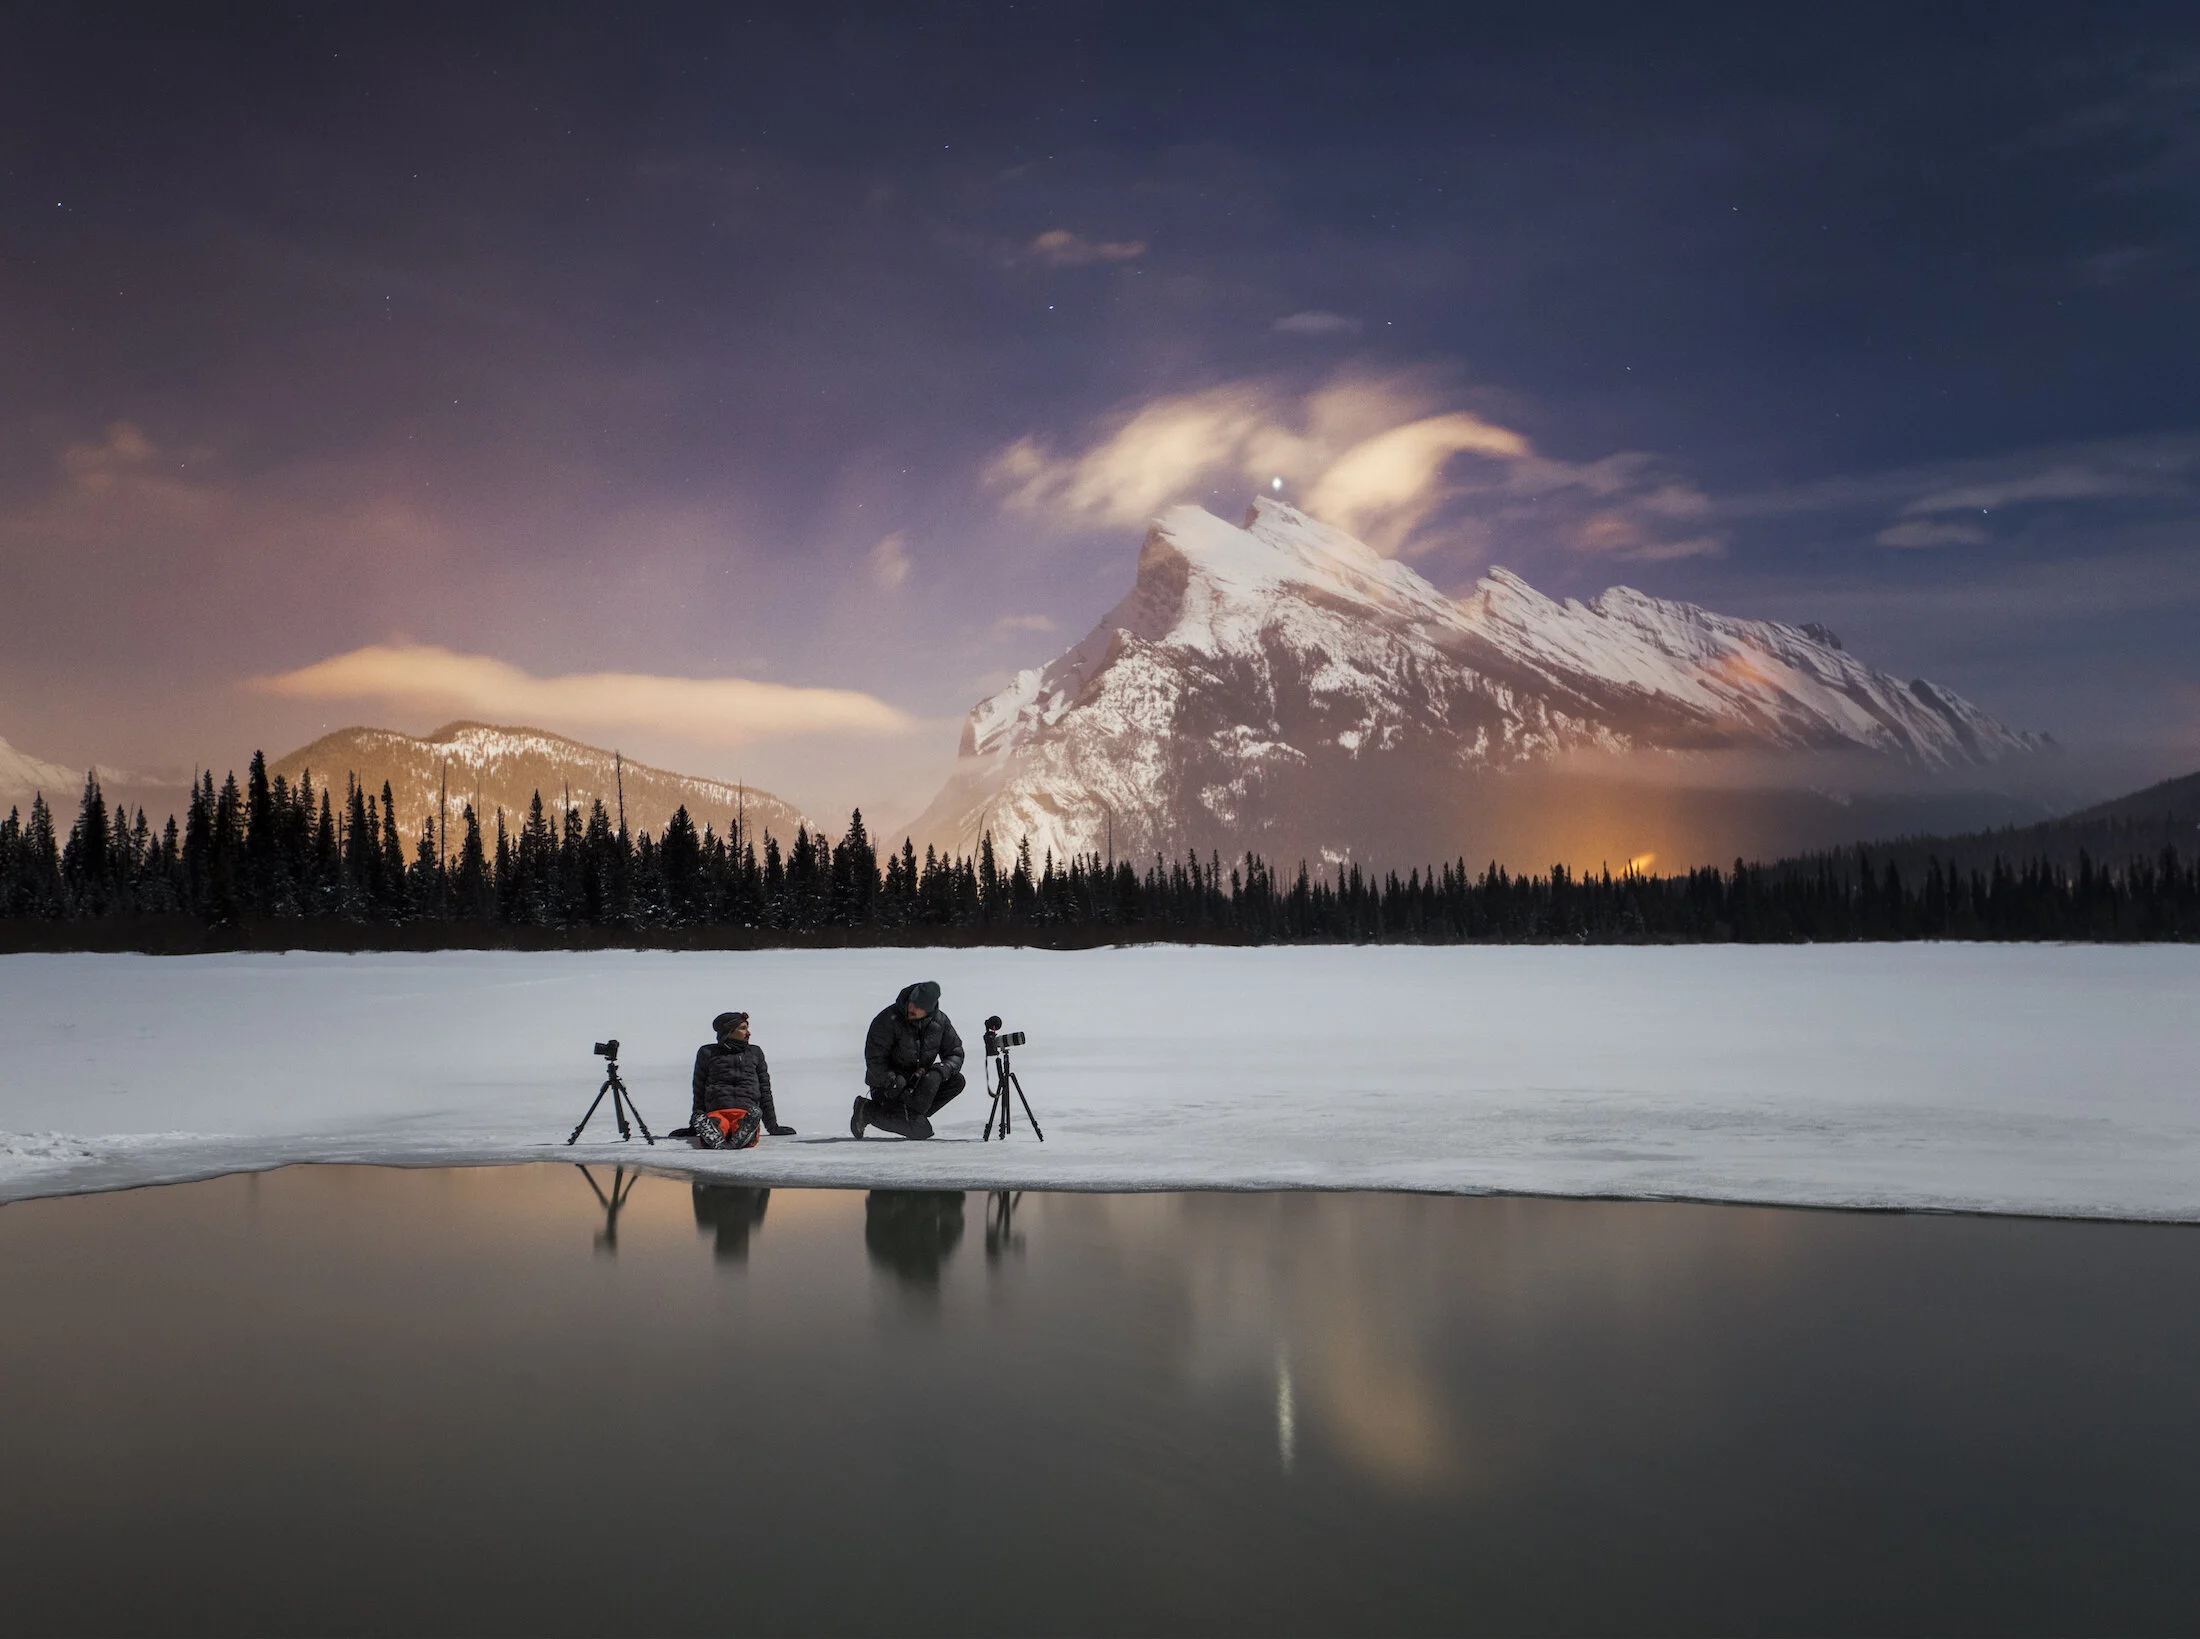
A curtain of lights in Greenland. Photo by Paul Zizka.
5. Commit the Time
Remember that catching the aurora borealis requires patience and persistence. There are so many factors that need to align to catch a good show, so don’t be discouraged if it takes multiple tries. Enjoy the thrill of the chase and stick with it!
Walking away from a northern lights show with strong photographs takes time too. The “spray and pray” technique that is often employed during the day simply doesn’t work at night due to the time-consuming nature of long exposures and astrophotography. Don’t be afraid to commit as much as 30 minutes to a single frame. The more you practice, the more efficient you will be when Mother Nature shows off her beauty.
And whatever the results, I hope you’ll put your experience in nature ahead of the images.

Daughter’s first aurora. Self-portrait by Paul Zizka.
For a deeper look including tips for reading data, post-processing tips, and a thorough list of resources, check out my eBook: Guide to Viewing and Photographing the Northern Lights (use checkout code AURORAWATCH15 to save 15%!)
Learn more:
Take a peek at my gear list to see what I rely on in the field.
Learn astrophotography techniques in-person at my Banff at Night workshop or online through my Shooting Stars: The Art of Astrophotography course.
Check out my 10 Favourite Places to Shoot the Northern Lights.
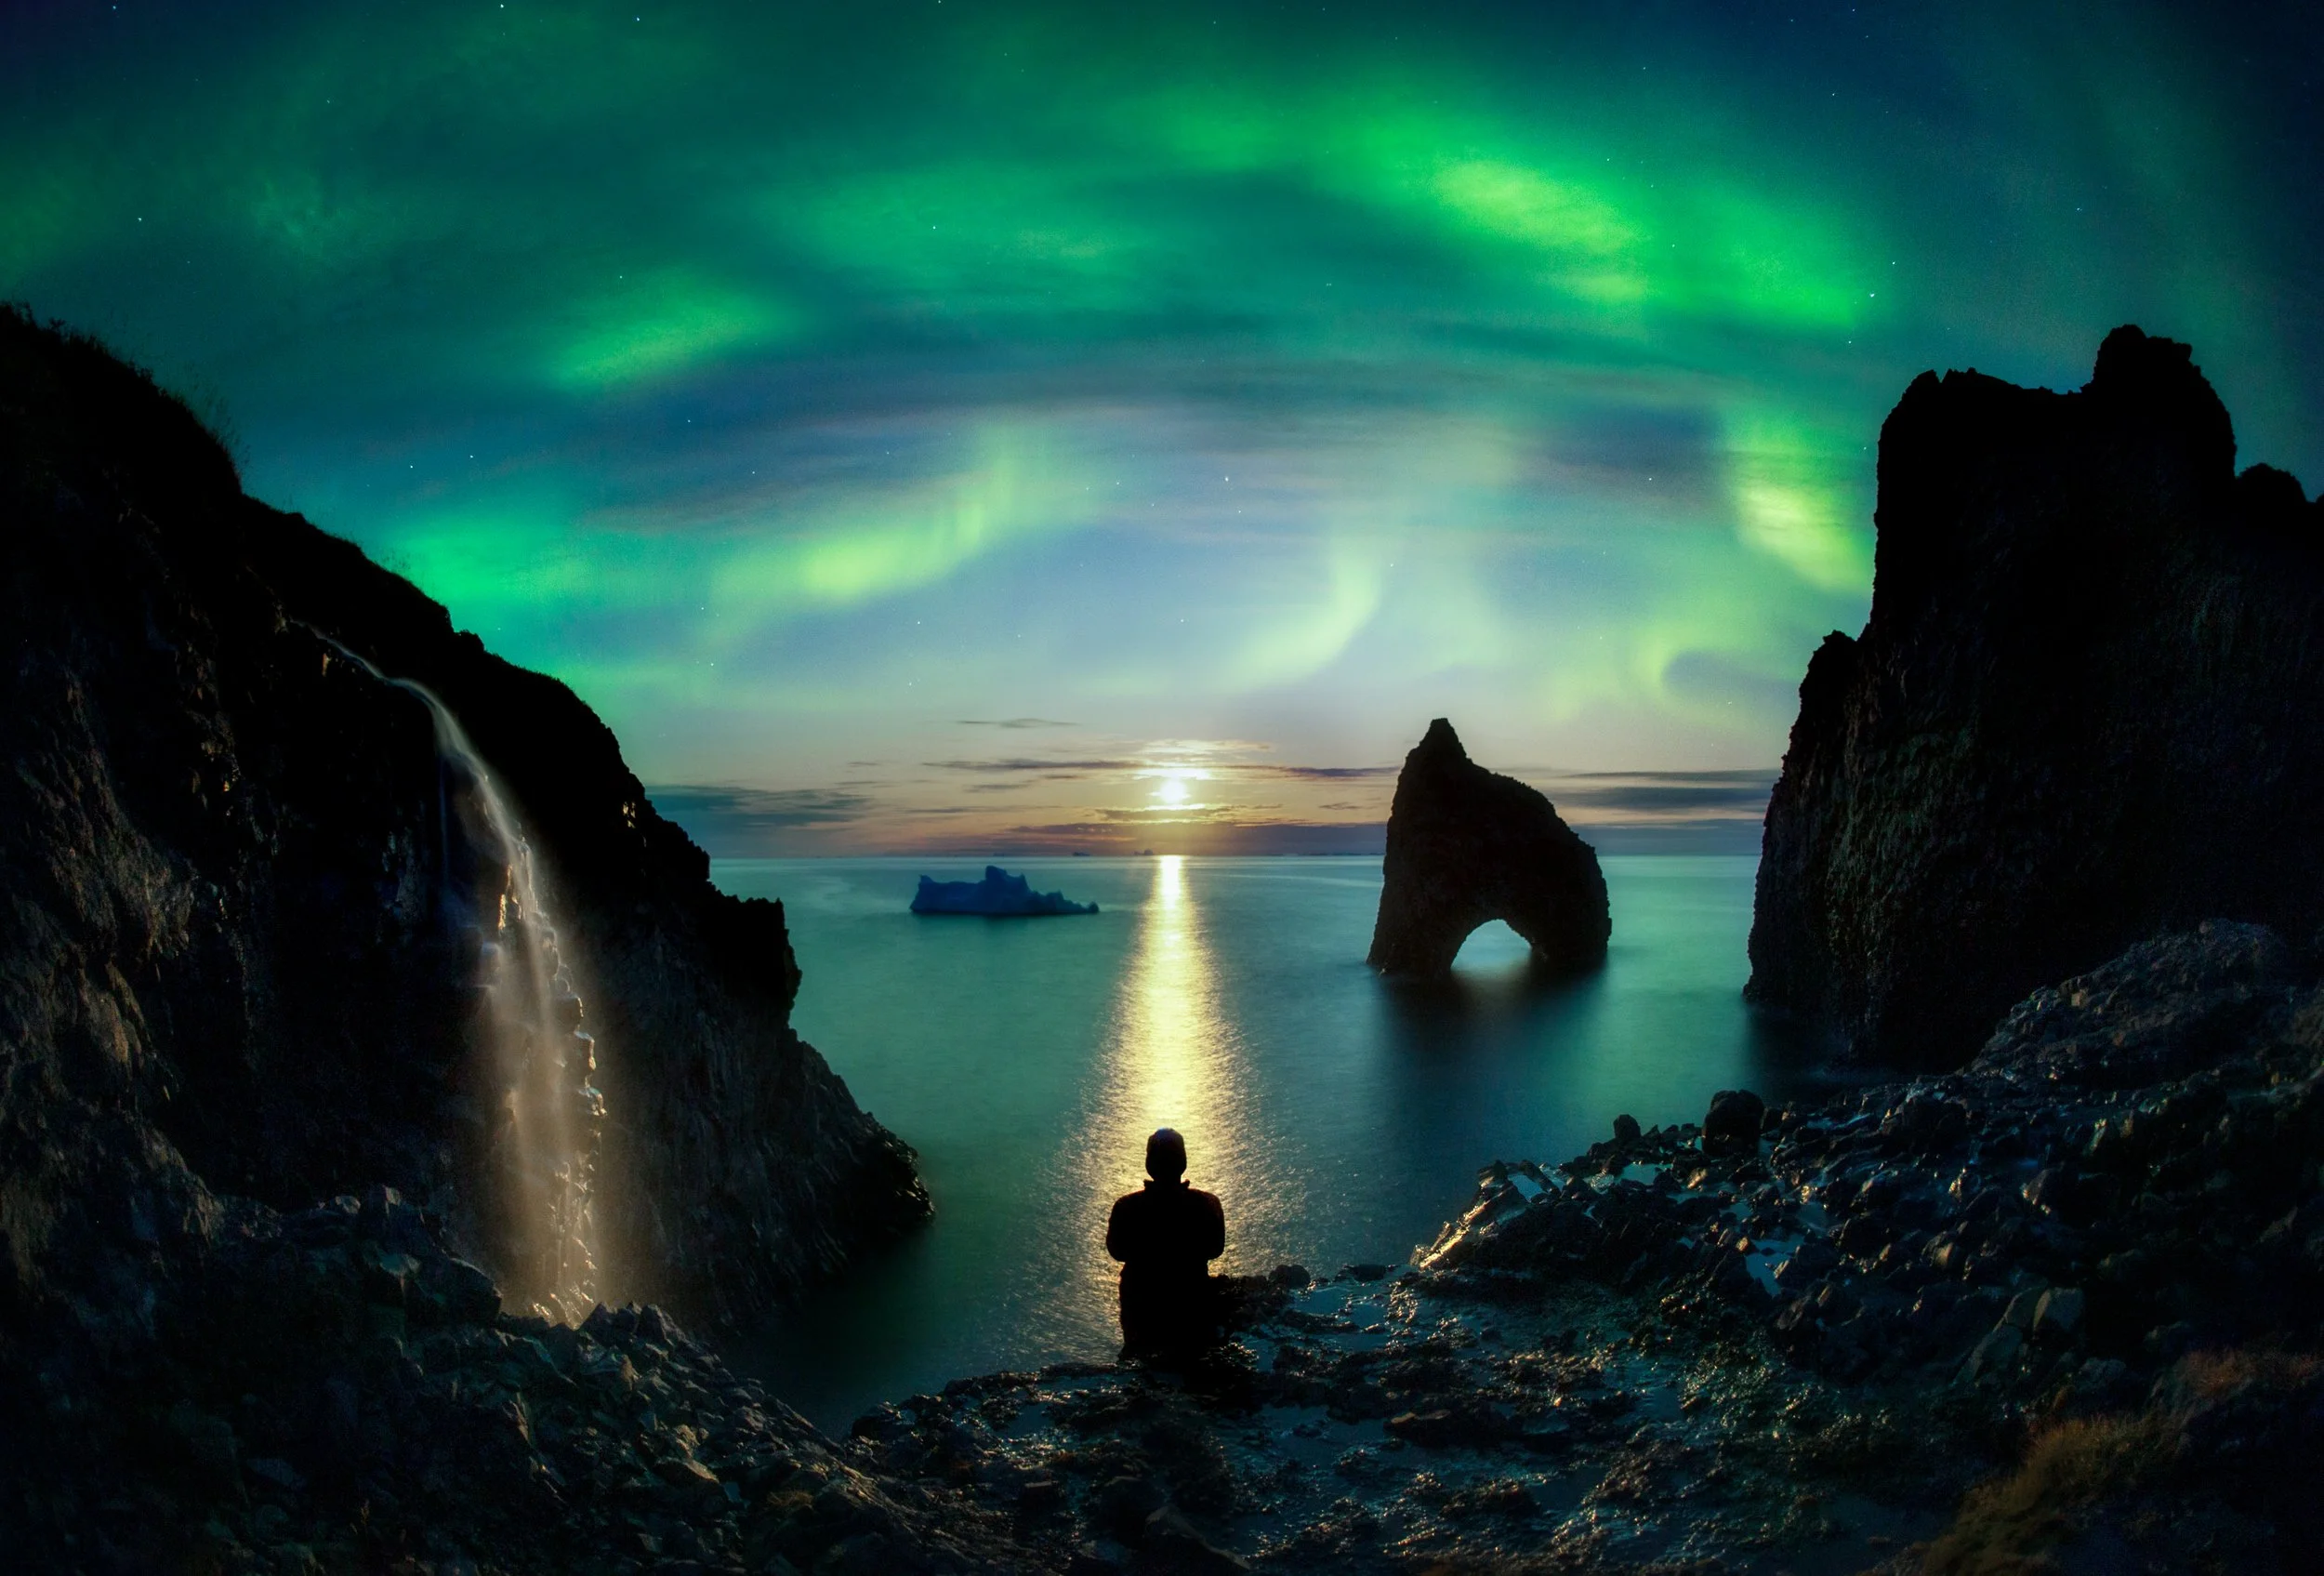
2022 Prime Time Calendar for Canadian Rockies Photography
I’m excited to launch the 2022 Prime Time Calendar for Canadian Rockies Photography! This planning calendar is a handy tool for photographers so that they can make the most of seasonal conditions and celestial phenomena in Canada’s prized mountain range.
I’m excited to launch the 2022 Prime Time Calendar for Canadian Rockies Photography! This planning calendar is a handy tool for photographers so that they can make the most of seasonal conditions and celestial phenomena in Canada’s prized mountain range.
For the past decade, Paul has been carefully watching when particular seasons unfold, from the needles changing on Lyall's larch trees to methane bubbles appearing in frozen lakes. This calendar combines that knowledge with known celestial or annual events, creating the perfect tool to help you plan your photography in the Canadian Rockies.
→ Note: This is a printable PDF catered to photographers, not to be confused with a hard-copy display/decorative wall calendar.
THIS YEAR THE CALENDAR IS FREE!


What's inside!
* Seasons and peak times for fall colours (Aspen, Lyall's larch and Western larch), methane bubbles, aurora activity, wildflowers, and Milky Way.
* Monthly and annual summaries for sunrise/sunset, average rainfall/snowfall and average temperatures.
* Celestial events, such as meteor showers, planet visibility, lunar eclipses and moon cycles.
* Paul's personal favourite times of the year.
* Recommended photo apps.
* Photo prompts and tips.
* Seasonal road closures in the Canadian Rockies.

Behind the Image: The "What If" Time
Perhaps the two rules you hear the most in landscape photography are “the rule of thirds” and “the importance of moving your feet.” The first one I think gets way too much attention, but the latter cannot be emphasized enough. This image is a prime example.
Perhaps the two rules you hear the most in landscape photography are “the rule of thirds” and “the importance of moving your feet.” The first one I think gets way too much attention, but the latter cannot be emphasized enough.
This image is a prime example.

Kalsoy, Faroe Island. Photo by Paul Zizka.
I shot this in the Faroe Islands on Kalsoy (a particularly epic corner of the archipelago). My OFFBEAT colleague Dave Brosha and I spent a considerable amount of time there, starting off with the compositions that were obvious to us immediately upon arrival. It's a phenomenal place, quite overwhelming, and we were engrossed for a while. And I think we both created a few solid images. But, for me, the real magic happened at the tail end of our visit there, during what I call the "what if" time.
That "what if" time is often when I create my best images. At that point, I (hopefully) have at least one more "traditional" image I'm happy with and I start to operate with more freedom, with a more open mind, more experimentally. And, usually, that means covering some ground. I try to always make time to walk, scramble and downclimb so I can get a different perspective on the place. Often it leads to nothing (but, hey, I get some exercise out of it and it satisfies my curiosity). But occasionally it'll open a photo op that completely takes me by surprise. It's often hard to predict how elements will line up once you've changed your point of view. You can guess but you never really know for sure until you've put in the work.
That day, it paid off. I left before Dave and wandered over to a nearby exposed ridge. When I turned back towards the area where we had been shooting for a couple of hours, a phenomenal scene took shape. A dip in the ridge aligned perfectly with some of the world's highest sea cliffs. Birds were swirling around and waves were crashing hard. There was even a high waterfall and some sea stacks to appreciate in the background. It became obvious that by compressing all that with a telephoto lens, and adding the human element, there was a strong image to be made. I ran back to where Dave was to get the 100-400 lens, had a chat with Dave, and then returned to my perch.
Dave walked the ridge a few times and in one of the shots everything ended up where it needed to be. The birds had good positioning and Dave had a stance that looked natural. I could have gone with a static pose but more and more I find dynamic modelling looks less forced.
I hope that encourages some of you to allow that extra five-minute period of exploration and exercise when you head out on your next photo excursion!
OFFBEAT is heading back to the Faroe Island for an unforgettable photography workshop, October 4-9, 2021! Find information and registration details here.

Resources for Photographing the Canadian Rockies
Each week I get emails or messages from fellow photographers asking where they should photograph in Banff National Park and the Canadian Rockies. Others ask me where to go hiking or scrambling so that they can get off the beaten track. I love getting these questions and seeing people’s enthusiasm for shooting these beautiful mountain landscapes.
Each week I get emails or messages from fellow photographers asking where they should photograph in Banff National Park and the Canadian Rockies. Others ask me where to go hiking or scrambling so that they can get off the beaten track. I love getting these questions and seeing people’s enthusiasm for shooting these beautiful mountain landscapes.
To provide you with some direction, I thought I’d compile a list of resources that will help you photograph the Canadian Rockies – books, websites and apps you can leaf through for yourself to identify your next photo sweet spots.
Mt. Rundle, Banff National Park. Photo by Paul Zizka Photography.
Books About Hiking, Scrambling and Mountaineering
Canadian Rockies Trail Guide, by Brian Patton and Bart Robinson
The definitive and comprehensive Canadian Rockies hiking guide book.
Classic Hikes in the Canadian Rockies, by Graeme Pole
An experienced hiker/author compiles his list of classic hikes in the Rockies.
Scrambles in the Canadian Rockies, by Alan Kane
The best resource for beginner to advanced scrambles in the Canadian Rockies.
11,000ers of the Canadian Rockies, by Bill Corbett
All the big peaks of the Rockies in one comprehensive guidebook.
Canadian Rockies Photography Facebook Group
Join our Facebook Group dedicated to exploration and creativity through photography in the Canadian Rockies!
E-Book: Photography in the Canadian Rockies
For my opinionated guide on 60+ locations between Banff and Lake Louise, check out Paul Zizka’s Guide to Photography in the Canadian Rockies.

* Features 60+ locations organized into regions:
1. In and Around Banff Town
2. Lake Minnewanka
3. Bow Valley Parkway
4. Banff to Lake Louise via HWY1
5. Lake Louise and Area
* The best spots to shoot aurora borealis, wildflowers and fall colours.
* Easy-to-use symbols to guide you through each location, as well as access to online map.
* Suggested itineraries for 1 or 3 days in summer and winter.
Get your copy of Paul Zizka’s Guide to Photography in the Canadian Rockies.

Some locations in the Canadian Rockies are obscure, require good fitness and navigational skills. If you’re really keen to venture off the beaten track, I highly recommend you invest some time in finessing these skills. Coleman Lake, backcountry of Banff National Park. Photo by Paul Zizka.
Apps for Photography + Tracking Weather and Skies
I’ve been an iPhone user for years, and rely on a number of apps to help me make the most of my photos and “read the skies” in the Canadian Rockies.
Photo Apps
PhotoPills: Sort of a Swiss Army knife for photographers and great for planning shoots precisely.
The Photographer’s Ephemeris: Another great photo planning app.
Weather/Sky Apps
SpotWx: precise, thorough weather info.
StarWalk: A stargazing app, great for identification of constellations and celestial features.
ClearDarkSky: for cloud cover
Webcams
It’s easy to overlook this one, but webcams give you an instant look at conditions from higher elevations and in distant areas.
Aurora Watching Web Resources
Perhaps the biggest question of all is where people can shoot the auroras in the Canadian Rockies. Thanks to our dark skies, you have a good chance of seeing them if they’re out, so long as there is no cloud cover.
One of the best resources for tracking them in Alberta is the Facebook group called Alberta Aurora Chasers. You can request to join here: AlbertaAuroraChasers.
I have also compiled my personal favourites in another blog post. You’ll need to learn to read the data, but you’ll find the full collection in Aurora Watching Web Resources.

Aurora Watching Web Resources
The big "FAQ" for me has always been "which northern lights prediction websites do you recommend?" No matter how much one monitors the data available, viewing the aurora always involves an element of unpredictability. Familiarizing yourself with the following resources should improve your chances.
The big "FAQ" for me has always been "which northern lights prediction websites do you recommend?" No matter how much one monitors the data available, viewing the aurora always involves an element of unpredictability. Familiarizing yourself with the following resources should improve your chances.
→ Alberta Aurora Chasers - Facebook Group
reports from aurora chasers on the ground
reporting auroras from the ground up
Alberta aurora status
Continued below…
More great resources to help you track, view and photograph the Northern Lights:
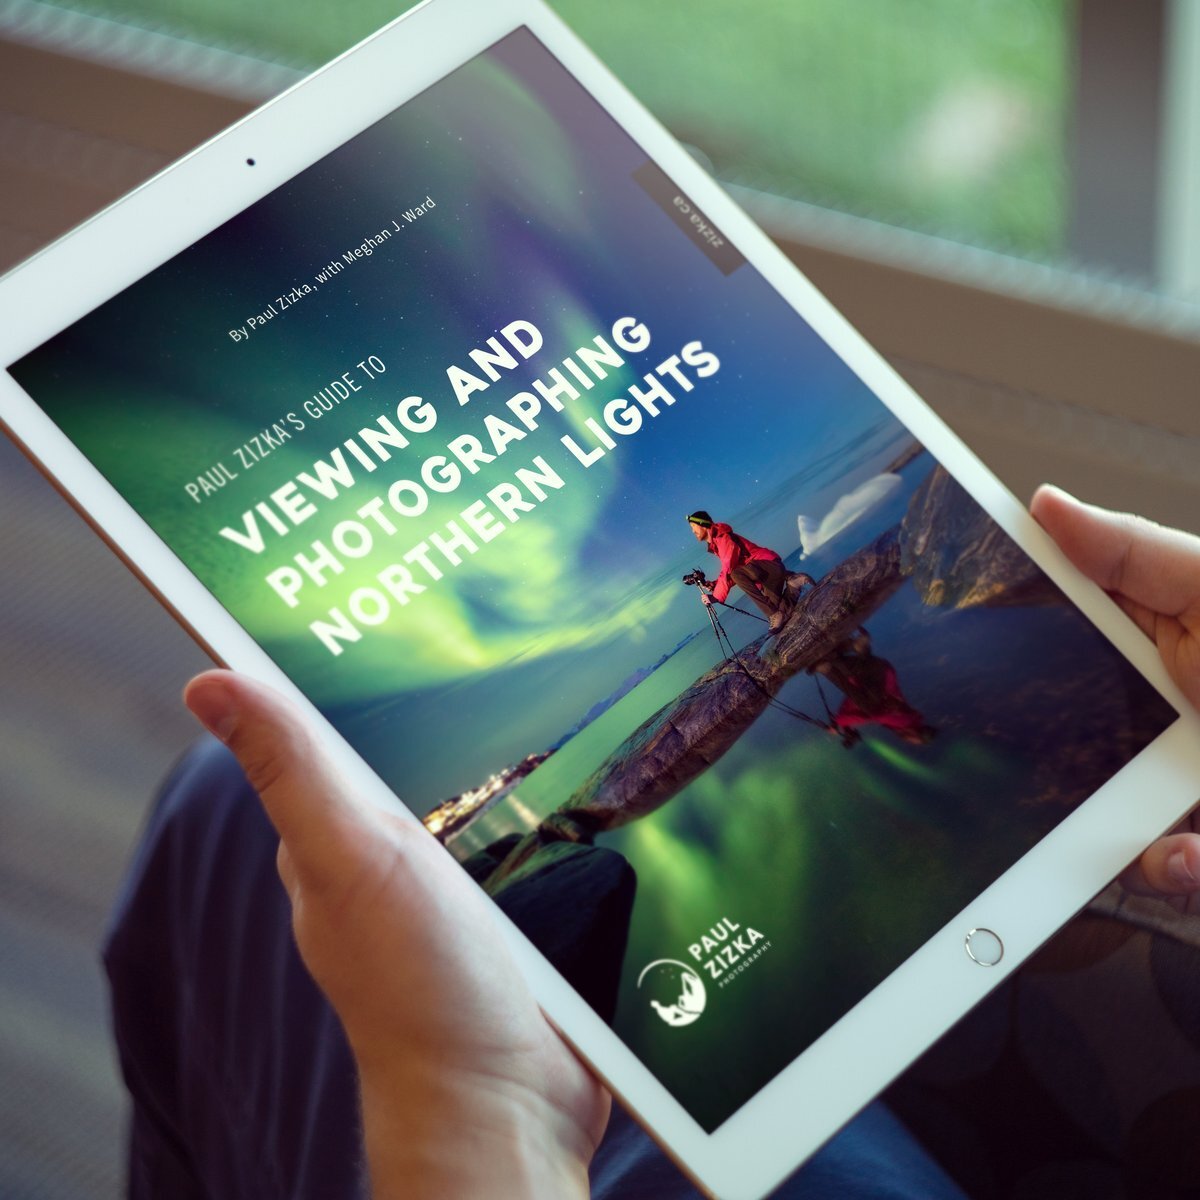
eBook: Paul Zizka's Guide to Viewing and Photographing Northern Lights
Astrophotographer Paul Zizka gives his best tips, tools, and resources for both viewing and photographing the northern lights. From tracking the data to camera settings and editing tips, this comprehensive guide is all you need to get started! This eBook is suitable for non-photographers and photographers of all levels of experience.
aurora borealis forecast
→ SolarHam
the latest space weather news and updates
→ Space Weather Prediction Centre
current space weather conditions
news and information about the sun/earth environment
→ University of Alaska Geophysical Institute
Alaska aurora forecasts
Tromsø LIVE northern lights solar activity, prediction and forecast
If you like northern lights photos, check out The Canadian Rockies: Rediscovered, by Paul Zizka.